


This easy-to-make gluten-free pizza crust mix can be prepared in mere moments and is incredibly handy to keep at your disposal. Simply combine with some water and oil!


Allow me to share, the first time I created a gluten-free homemade stuffed crust pizza… it was truly transformative. I believe I may have even shed a tear of joy.
Gluten-free homemade pizza dough was consistently challenging for me when I tried to create new recipes because nothing seemed satisfactory. Why would anyone want to add all their beloved toppings onto an inferior pizza base? Certainly not me!
Certainly, absolutely… When it comes to pizza dough, Caputo flour is definitely the way to go.
When I was organizing the menu for our latest camping adventure, and my spouse asked for pizza, I opted to revise my homemade dough recipe to create a pizza crust mix instead.
It’s quite different when you’re doing it at home with all your equipment like a stand mixer and an oven for proving. Allow me to say this: camping environments are far from optimal for such activities.
I combined everything manually using a foldable bowl, then worked it over several times until it was nice and smooth. There were absolutely no issues; it handled wonderfully!
I sealed the bowl with plastic wrap and allowed it to rise on the dashboard of our vehicle. Guess you could call it a natural proofer. It rose beautifully—possibly even better than it does at home! Truly, an excellent solution for such conditions!
This DIY crust mixture isn’t just for camping trips; you can prepare plenty of them efficiently, like an assembly line, to keep handy for your upcoming pizza nights.
Take care of all the measuring at once, and spend much less time producing a batch of pizza!
Sure, this recipe yields one 12-inch pizza featuring either a stuffed crust or a thick crust option. Additionally, you can utilize it for my
Gluten Free Detroit Style Pizza
recipe, or divide it into 4-6 individual pizzas.
In any case, let’s take a look at what you’ll require so you can begin preparing your very own gluten-free pizza crust mixes from scratch!
Ingredients
Except for possibly the flour, which can often be found at specialized stores, this recipe calls for very common ingredients.
Here are my brief ingredient observations for this recipe:
Caputo Fioreglut Flour
If you’ve been following my work for a while, you know that I am *vehemently* anti- gluten free all purpose flour mixes.
Simply because various flours possess distinct tastes and characteristics,
You’re much better served utilizing individual ingredients at proportions tailored specifically for what you desire from your flour. Gluten-free flours possess distinct flavors and characteristics, and none truly function as “one size fits all,” unlike wheat flour.
When it comes to the
Caputo Gluten Free Flour
, you’re looking at a blend of gluten-free wheat starch, dextrose, maize starch, buckwheat flour, rice starch, psyllium seed fibre, thickener, guar, and flavouring.
Therefore, if wheat allergies are an issue for you, this might not be a suitable choice… but seemingly, it is safe for others following a gluten-free regimen, including those with celiac disease!
Now, I’ve created numerous gluten-free dough recipes over the years, but this one produced the most stunning gluten-free pizza dough I have ever encountered.
Seriously, once I had it kneaded together, it looked and behaved like regular pizza dough. It bakes up whiter than a regular pizza crust, but other than that… damn.
What I’m trying to say is that even so, there isn’t an “all-purpose” gluten-free flour that excels at every task, and this rule still applies.
The Fioreglut flour is primarily suited for making bread; apparently, it doesn’t work well for items such as cookies or cakes.
We bought our first bag on Amazon – spendy, but worth it! – but then found a local import grocery store that carried it at a much lower price. SCORE! Check your local Italian grocers, you may find similar deals.
Instant Yeast
Although I typically opt for active dry yeast in my baked goods, you should go with instant yeast when preparing your homemade pizza dough mixture.
For activating active dry yeast, you should dissolve it in lukewarm water to bring it to life.
Quick-rise yeast, often referred to as fast-acting or instant yeast, bypasses this additional process. Its yeast granules are finer, making them quicker to activate.
This works great for such a blend – simply combine the warm water and oil with the mixture, then knead into dough. Additionally, it ferments quicker and more effortlessly compared to conventional yeast, allowing for just one rising stage.
Typically, I let the dough rise for an hour, followed by kneading it down and allowing it to rise again. However, this second rising step is completely optional when utilizing your homemade pizza crust mixture.
Everything Else
Rounding out this recipe, you will need
Granulated sugar, baking powder, and salt for the mixture itself.
To prepare the mixture, you will require some lukewarm water along with olive oil for the dough, and cooking spray for working with the dough.
Additionally, you have the option to use cornmeal and/or sesame seeds. Personally, I prefer using cornmeal on the pizza tray as it adds a delightful crunch to the base of the pizza crust.
Afterwards, I typically apply some pan spray around the perimeter of the crust and top it off with sesame seeds—to enhance both the taste and texture.
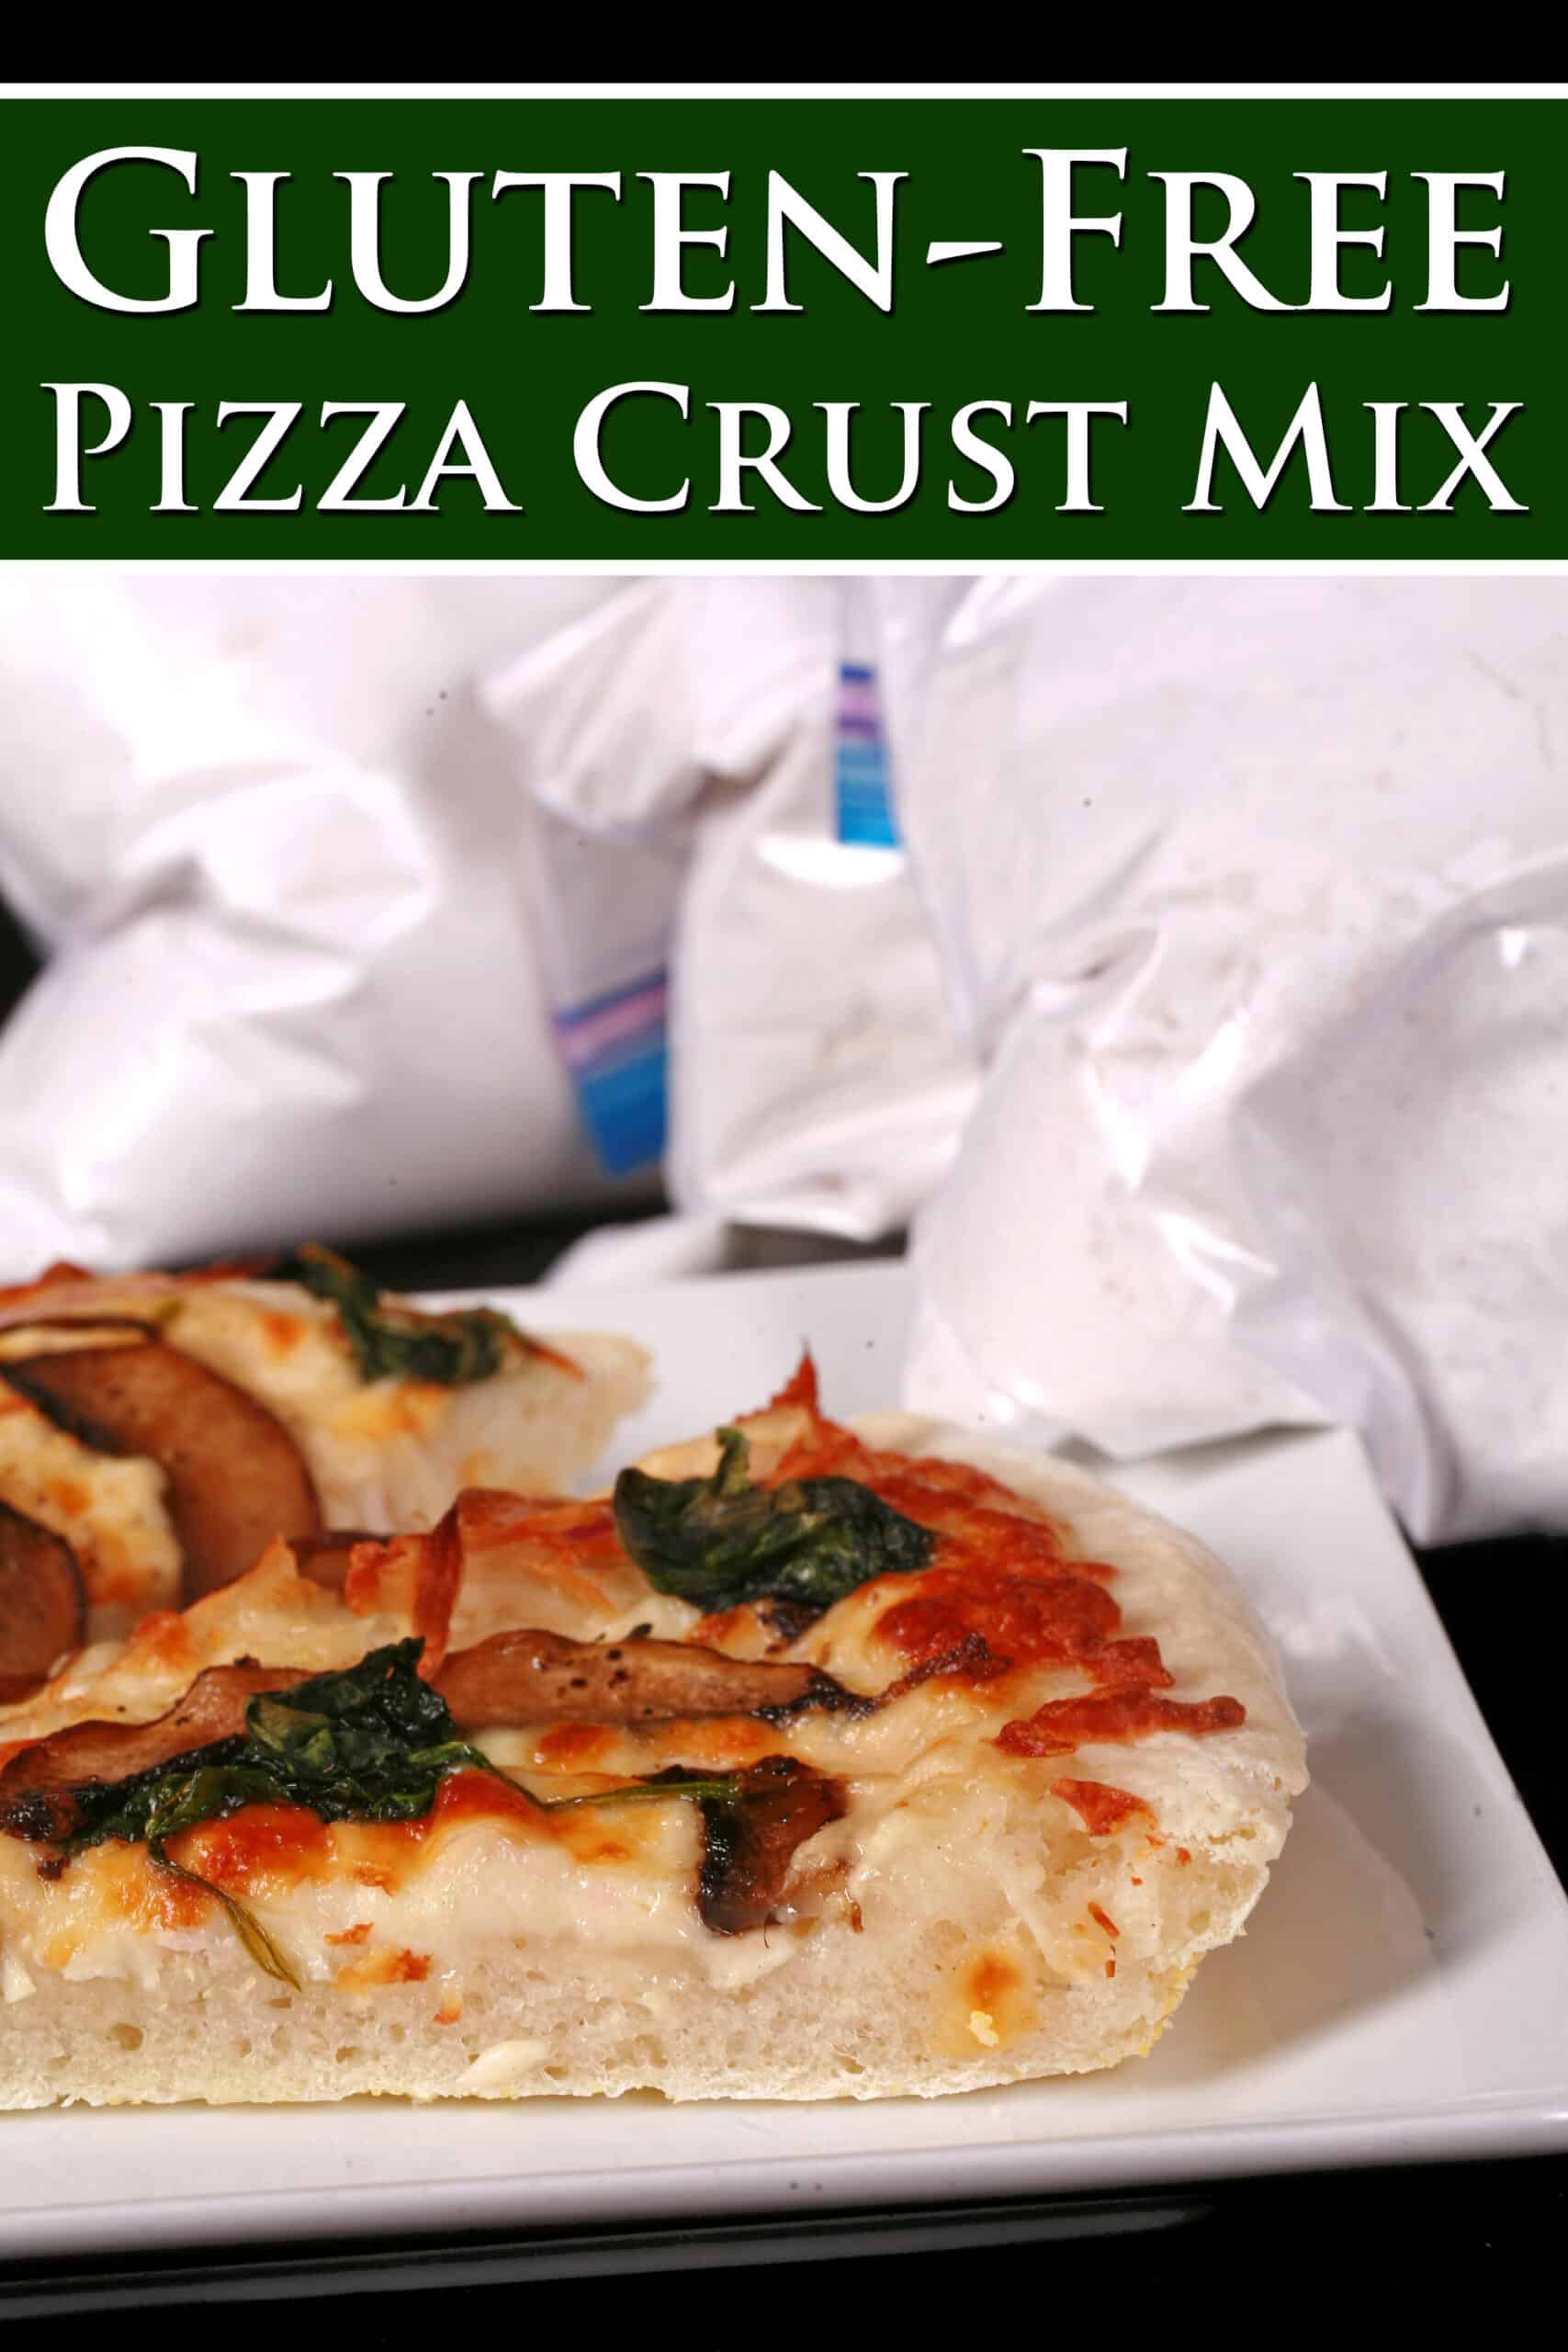
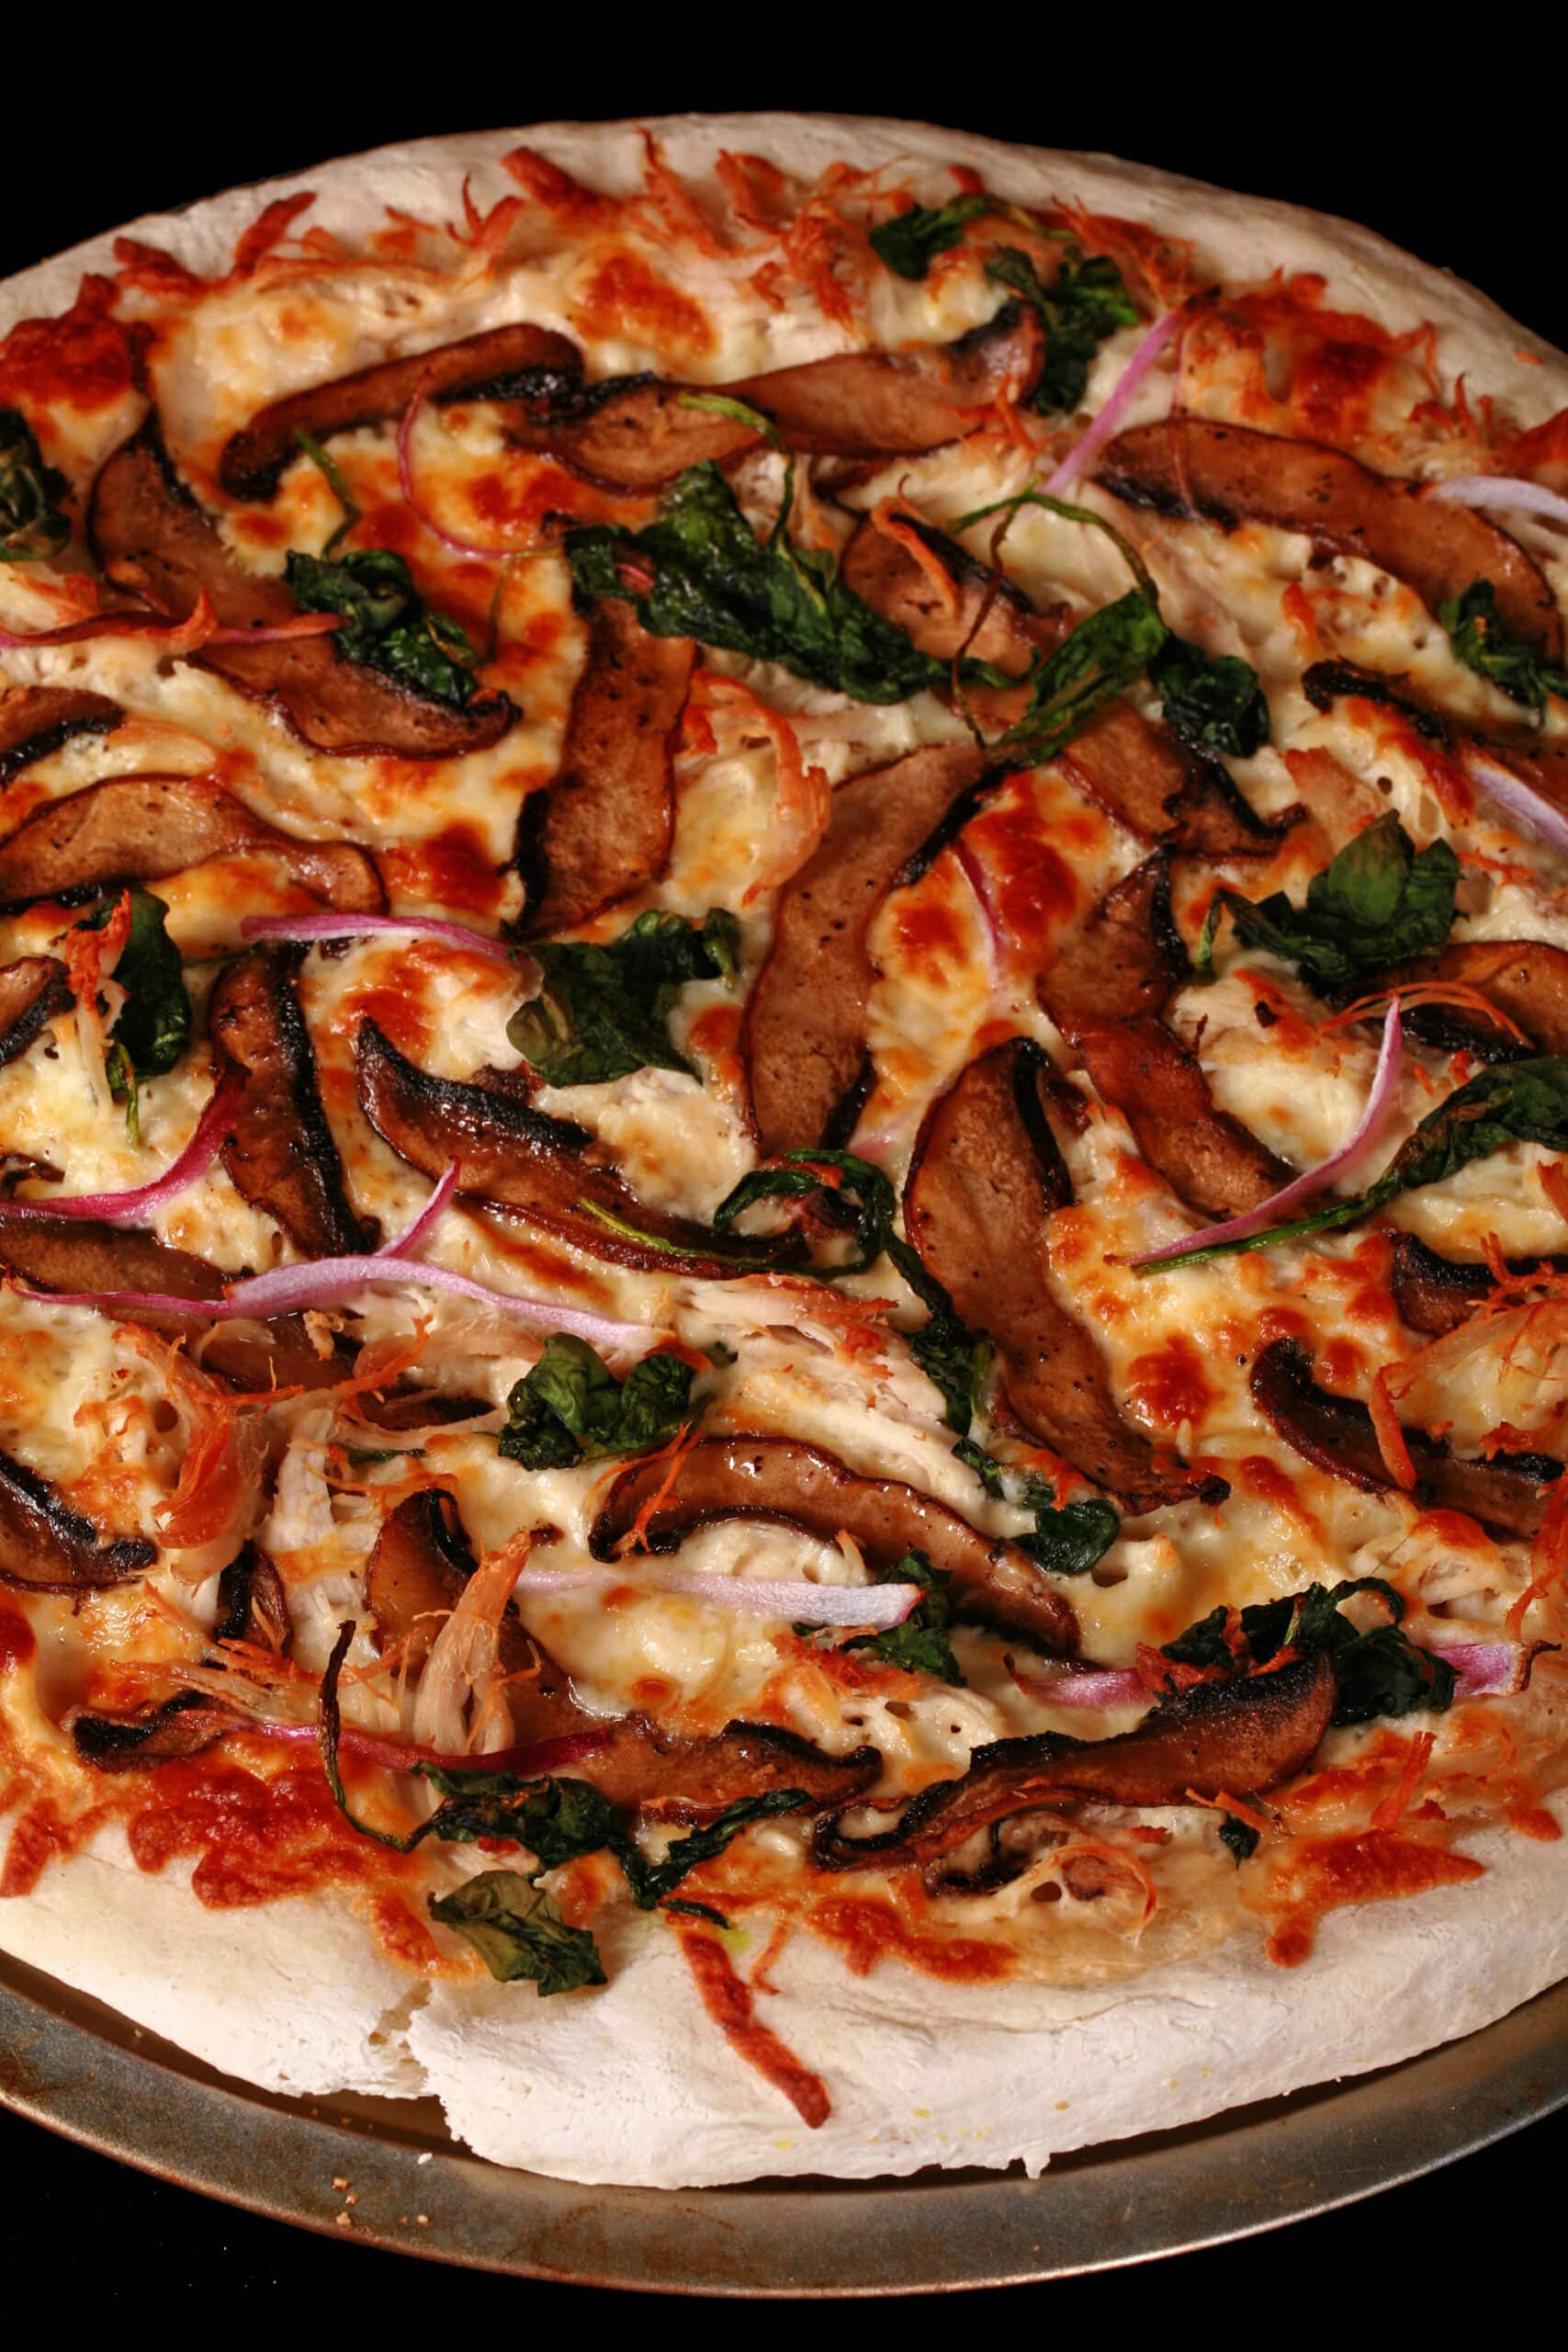
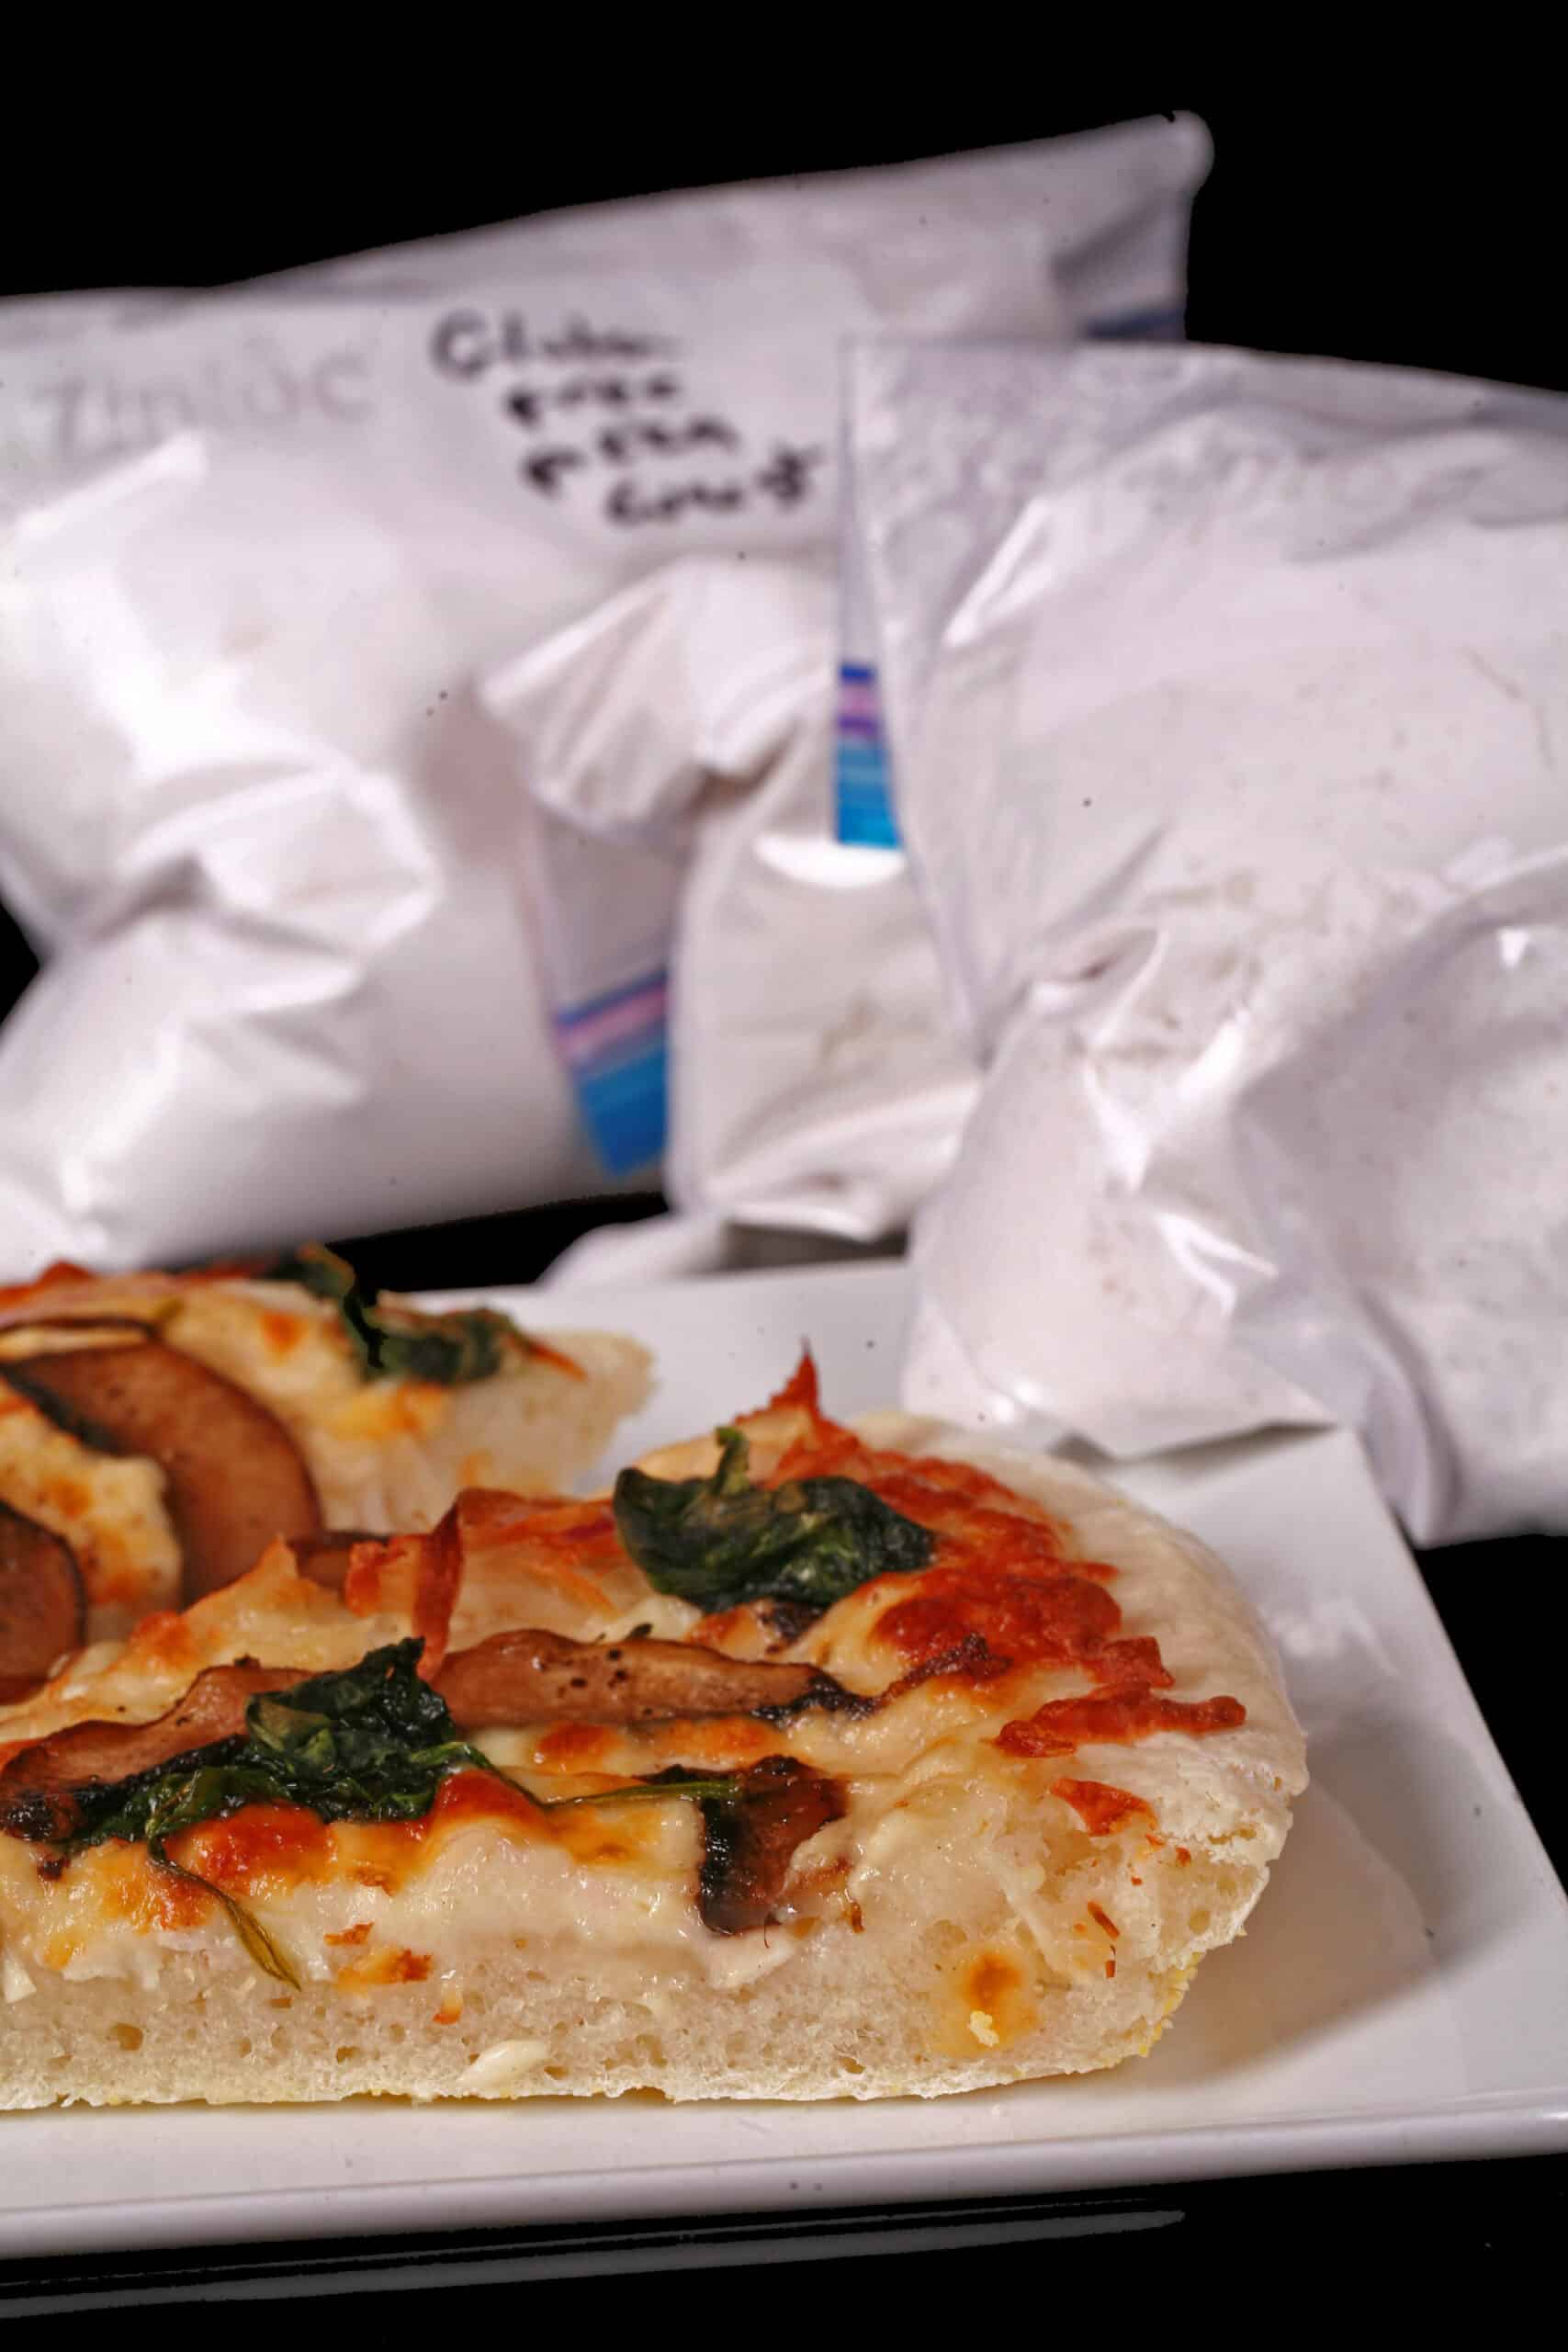
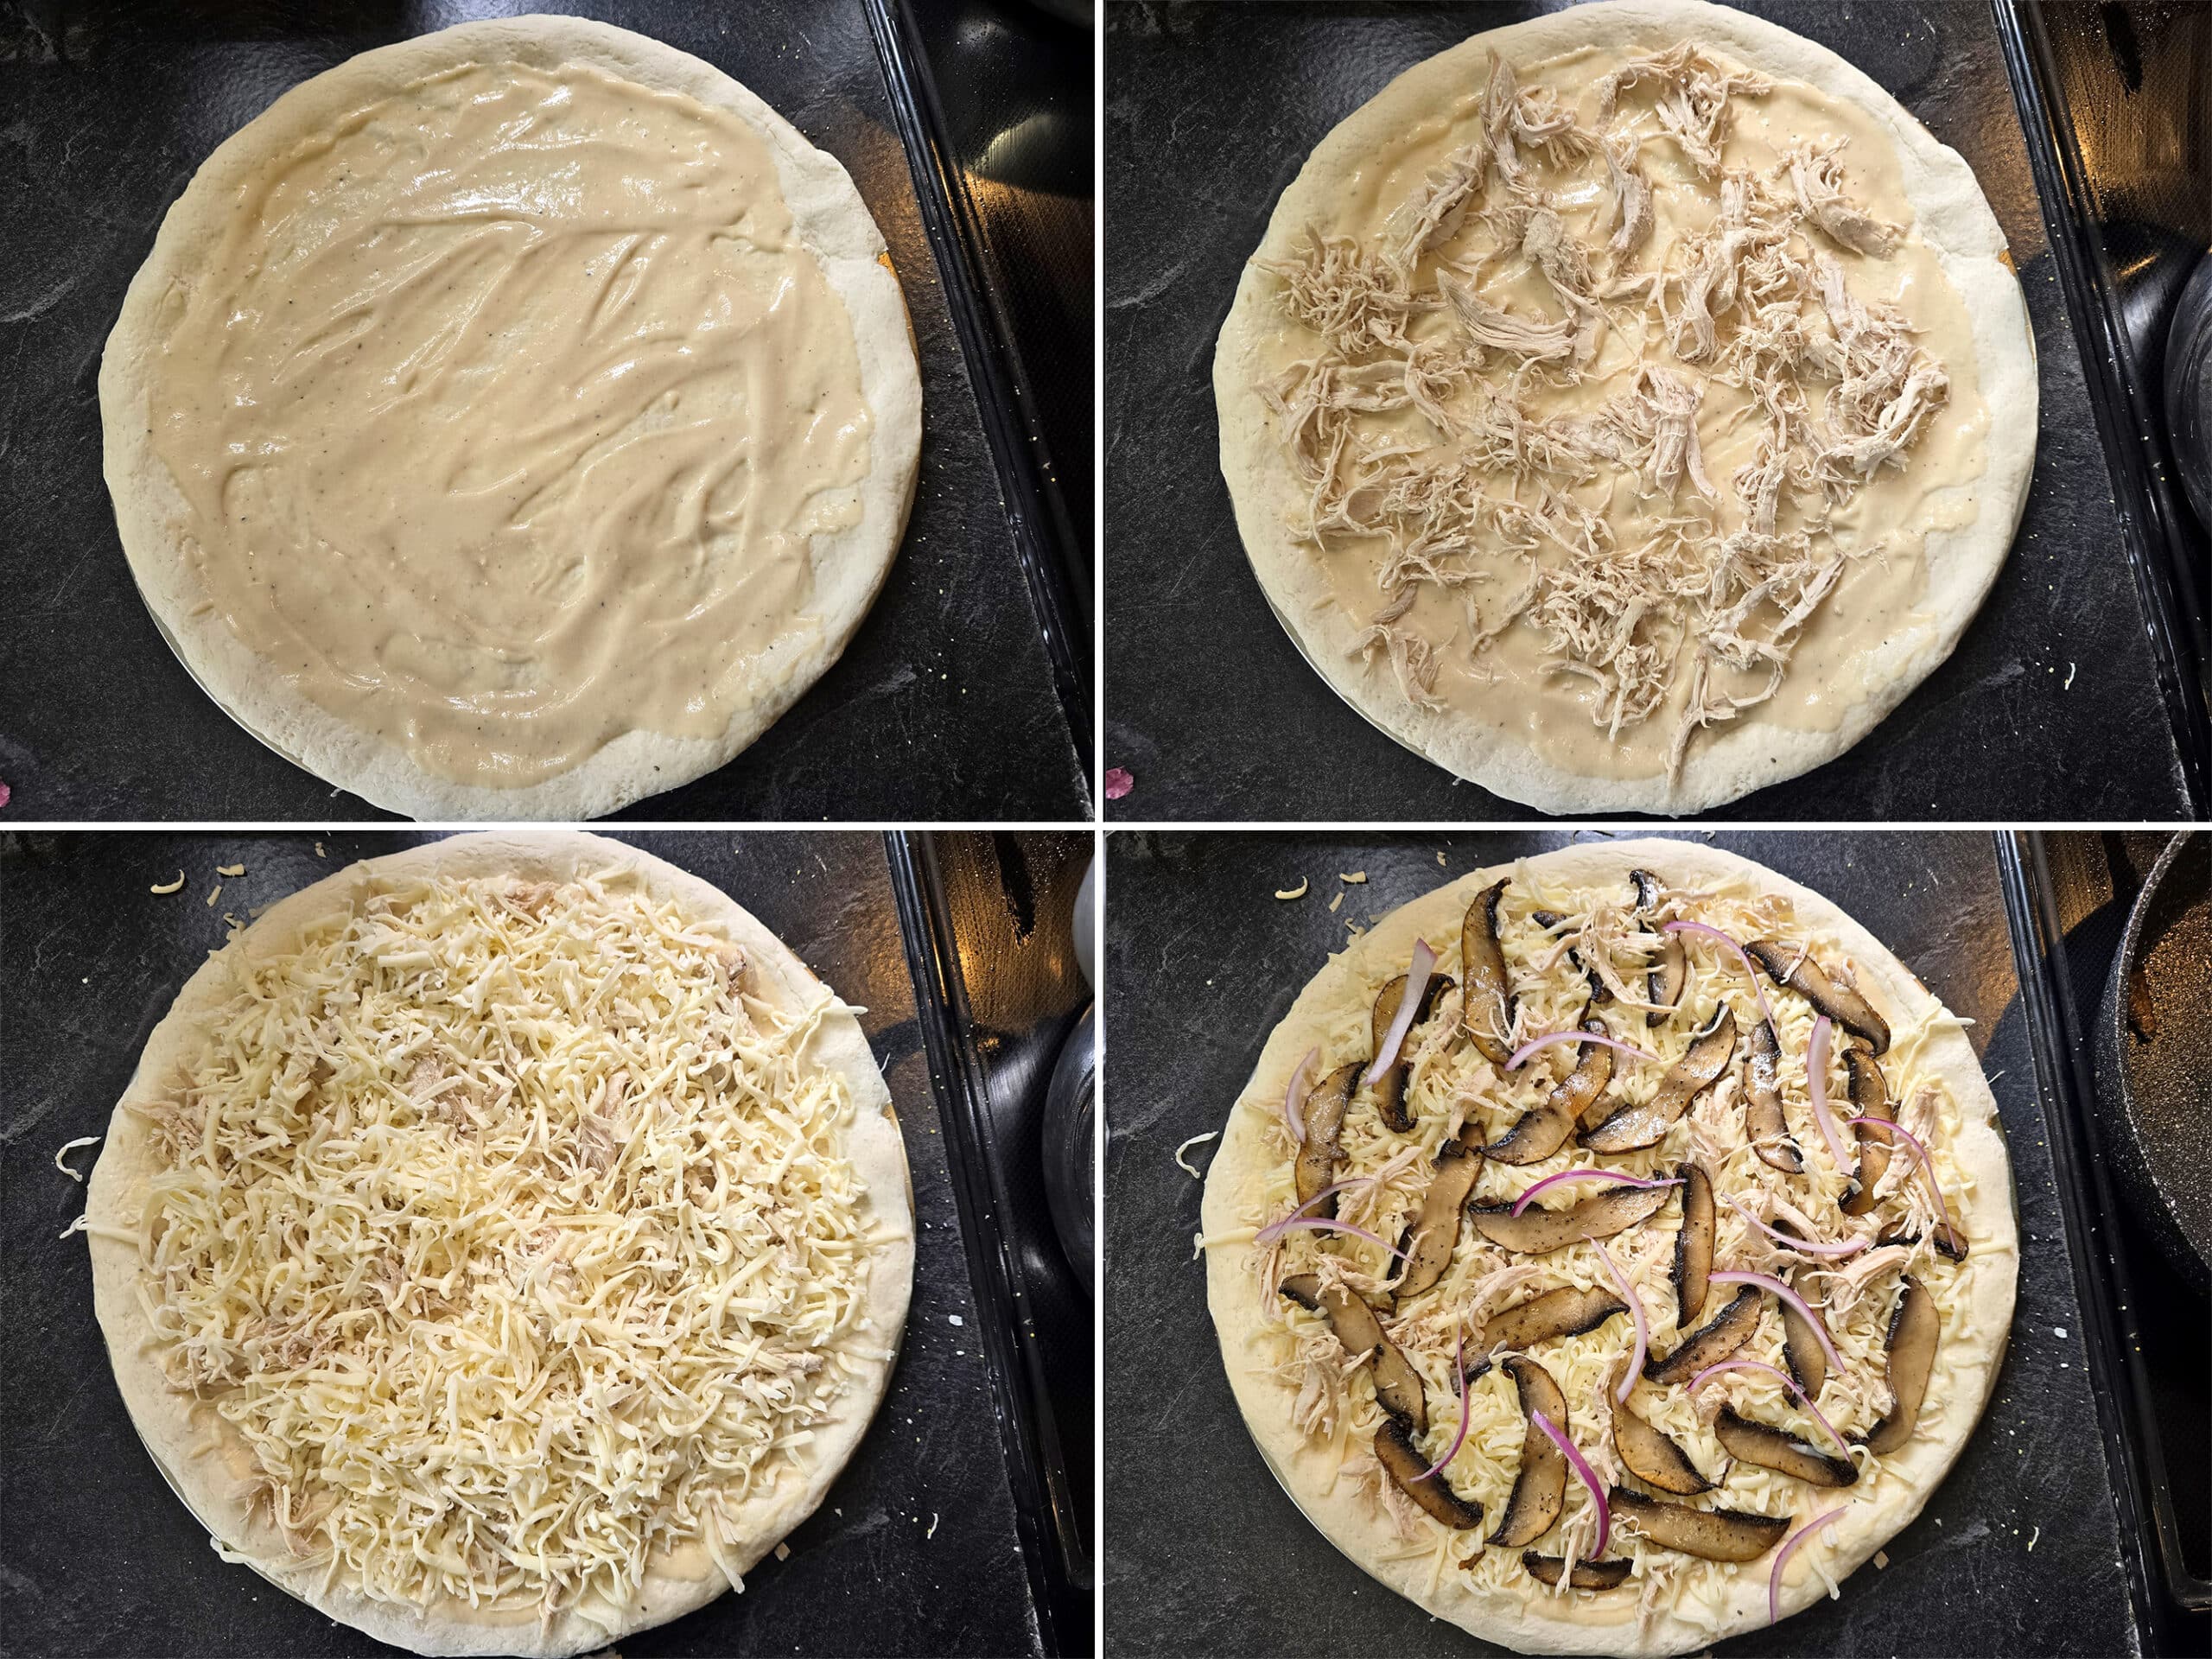
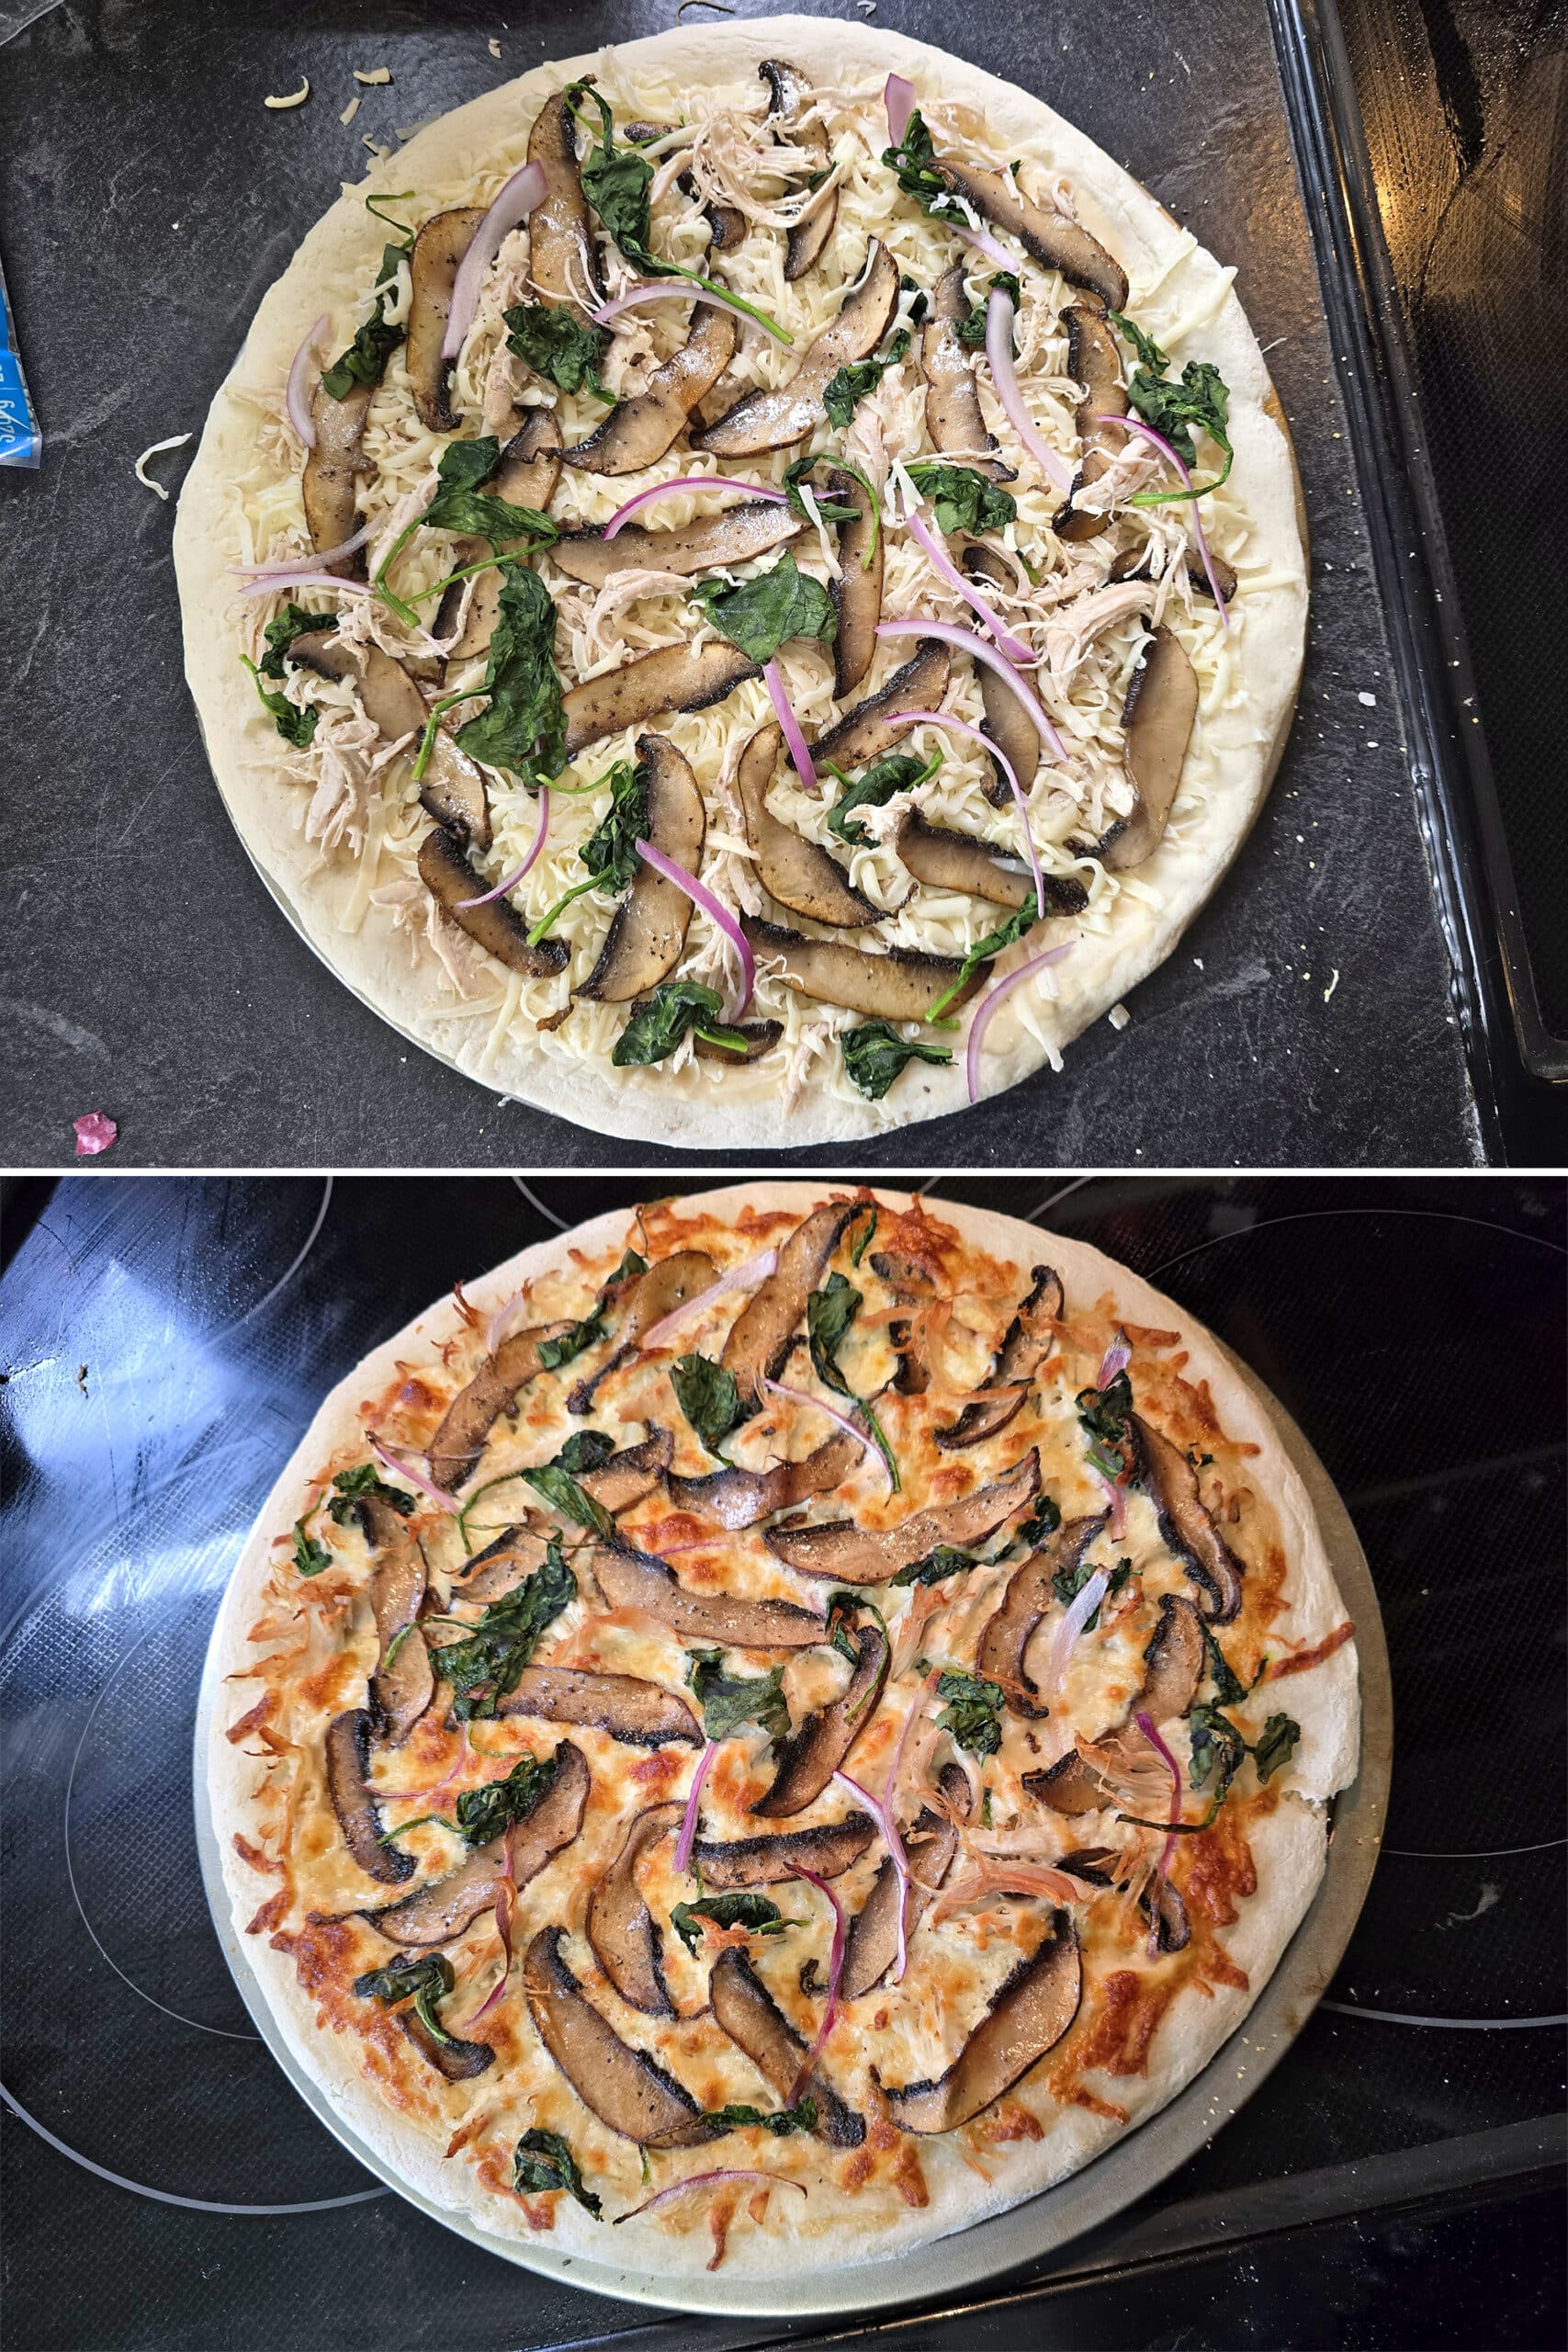
Finally, you’ll need your favorite pizza sauce, some shredded cheese (I like to use pizza mozzarella cheese), and your favourite toppings.
As shown in this post, I opted for a white sauce as my pizza base, followed by adding toppings.
Dutch Oven Pulled Chicken
, Portobello mushrooms, red onions, and spinach.
Share the Love!
|
How to Prepare a DIY Gluten-Free Pizza Crust Mizصند
The complete recipe can be found on the downloadable recipe card at the conclusion of this article; below is a step-by-step visual guide.
Prepare the Gluten-Free Pizza Blend
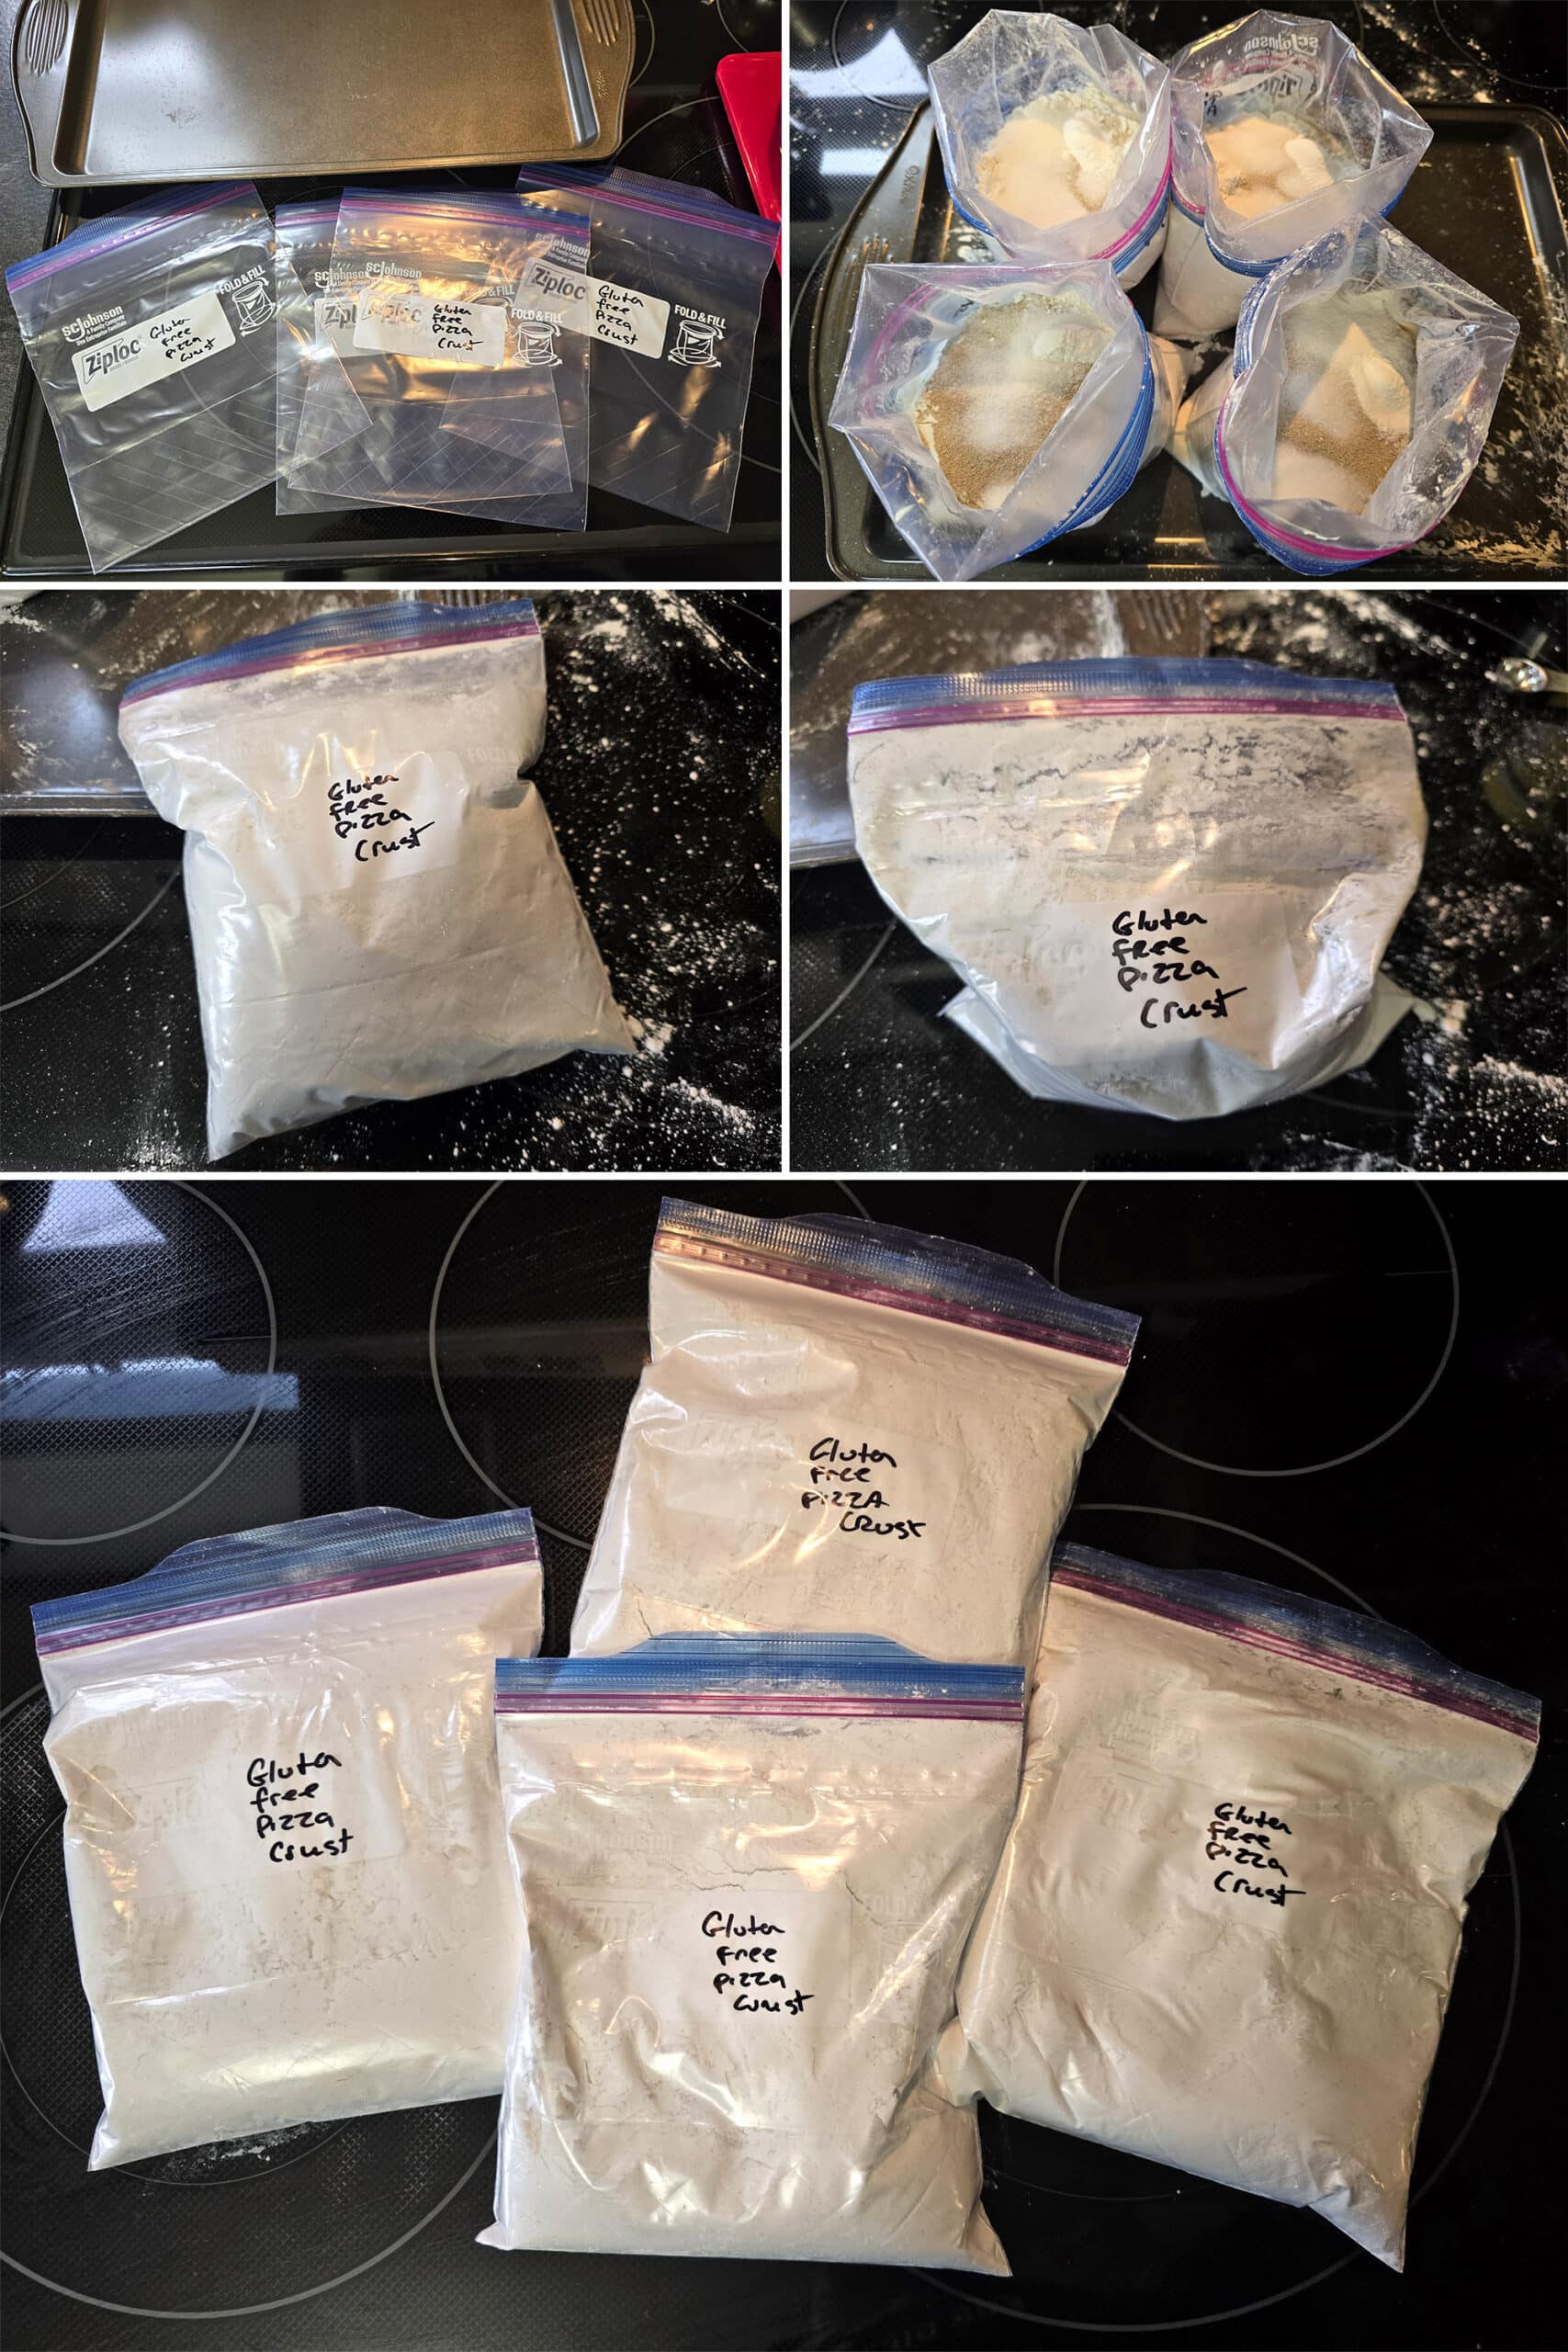
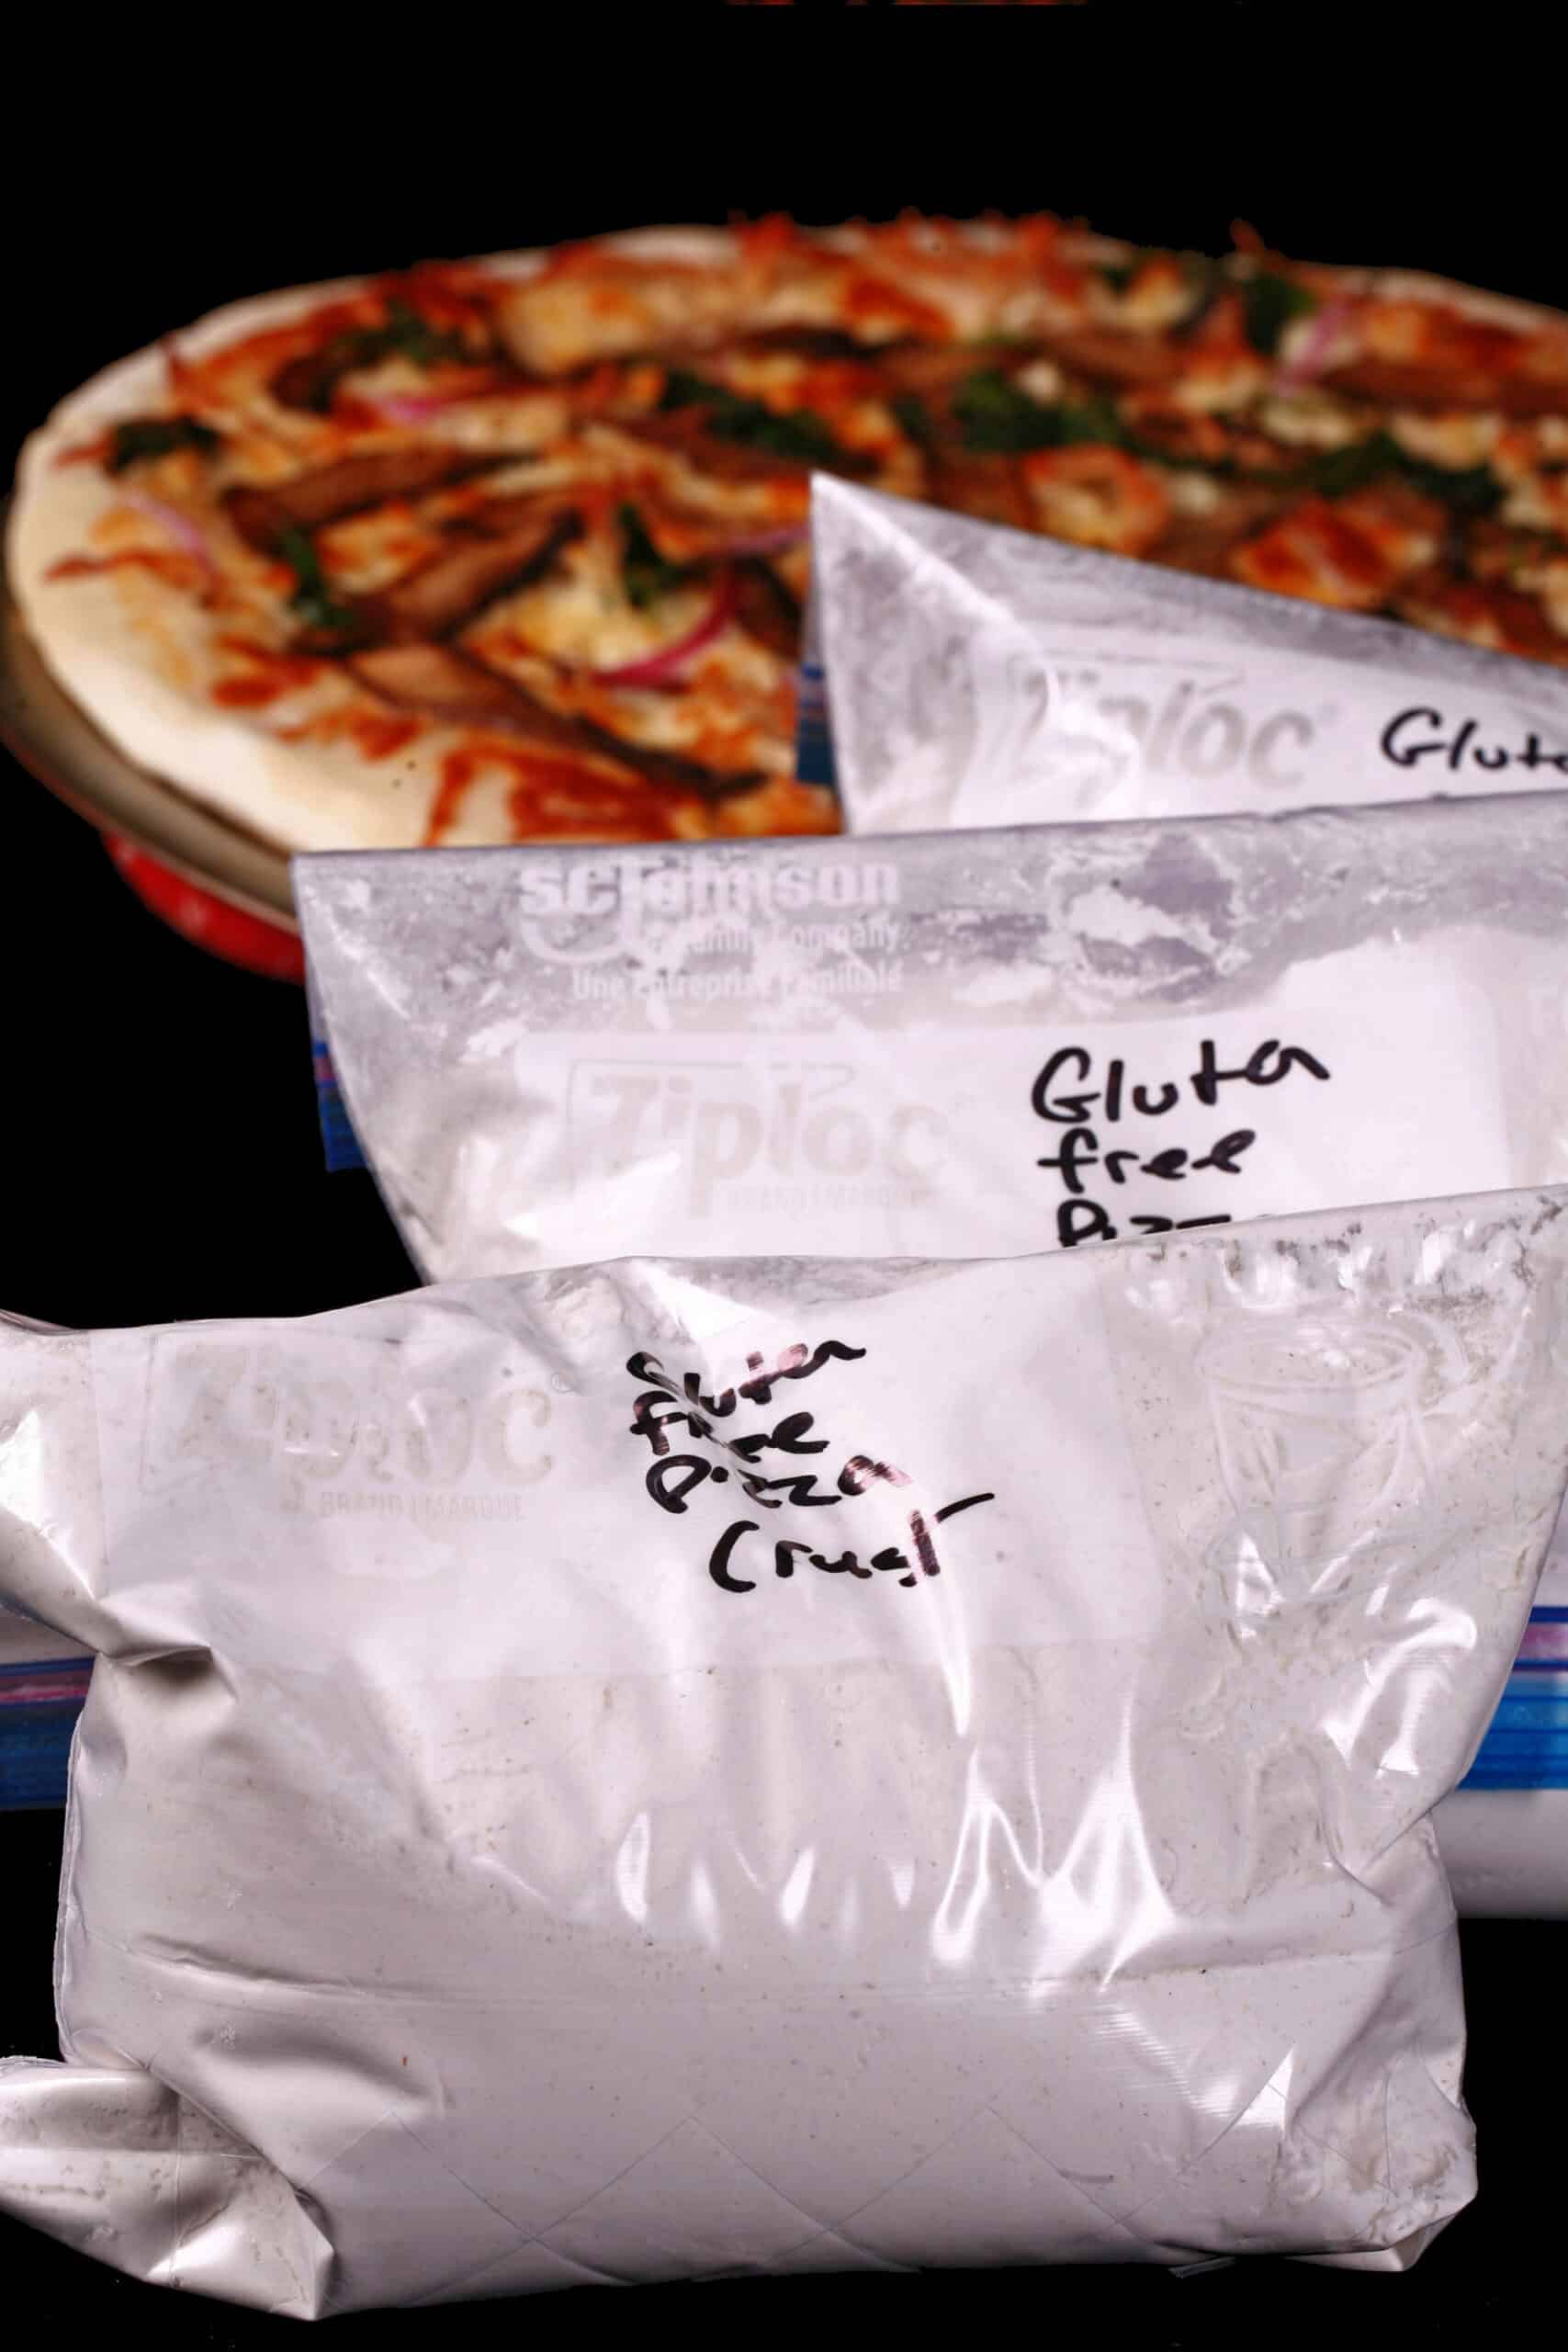
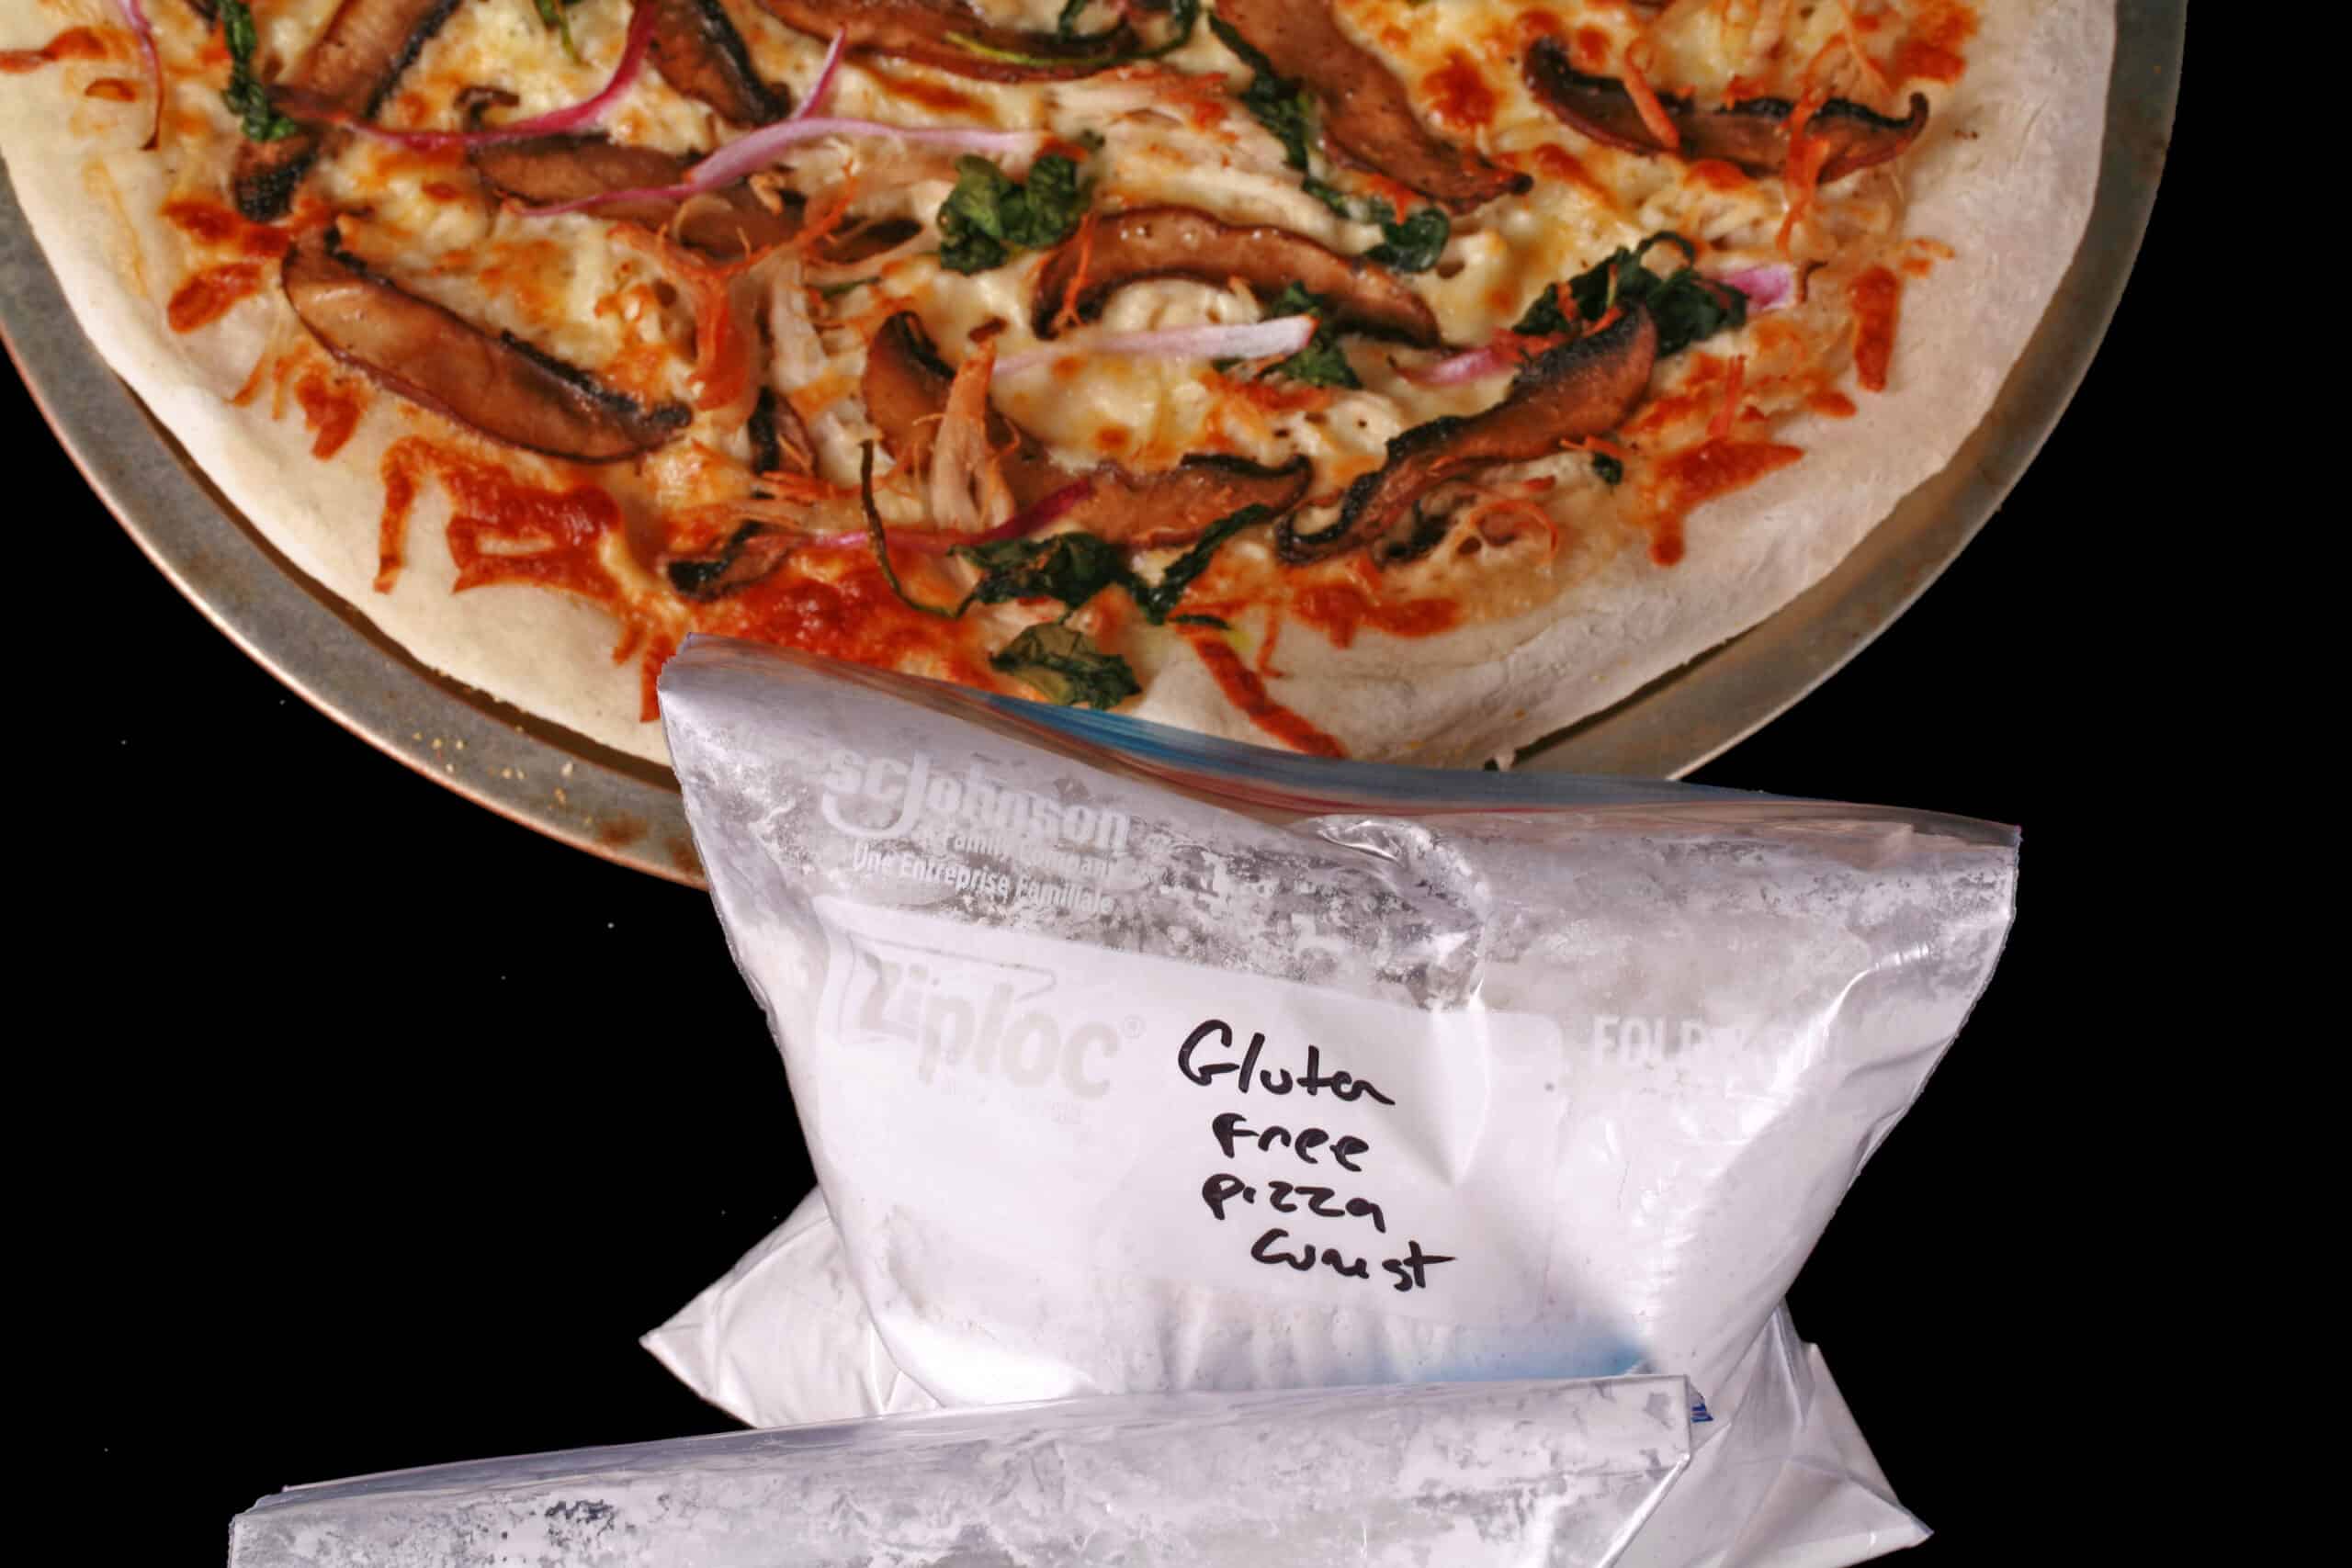
Label a medium-sized freezer bag with “Gluten-Free Pizza Crust Mix,” including the list of ingredients beneath “To Use the Mix” and any instructions you’ll need readily available.
Pour the flour, yeast, salt, sugar, and baking powder into the baggie. Close it securely, shake well to mix everything together, then let it sit quietly for a moment.
Open the bag again, carefully squeeze out extra air and seal it shut. Keep stored in a cool, dark, dry location until you’re ready to use it.
For Using the Gluten-Free Pizza Crust Mix
Transfer the mixture into a big mixing bowl, or use the bowl of your standing mixer.
Mix in the hot water and olive oil, stirring thoroughly with either a wooden spoon or a silicone spatula until everything is combined.
Turn the dough out onto a floured surface and knead until it becomes soft and smooth, which should take around 3 to 5 minutes. (As an alternative, you can knead it manually first, then use a stand mixer equipped with a dough hook for approximately 3 minutes, or continue until the dough achieves a smooth texture).
You want the dough to be smooth yet retain a slight stickiness. Should the dough lack this stickiness, incorporate a bit of water and work it into the mixture. Conversely, if the dough is overly sticky, introduce a small quantity of Caputo flour.
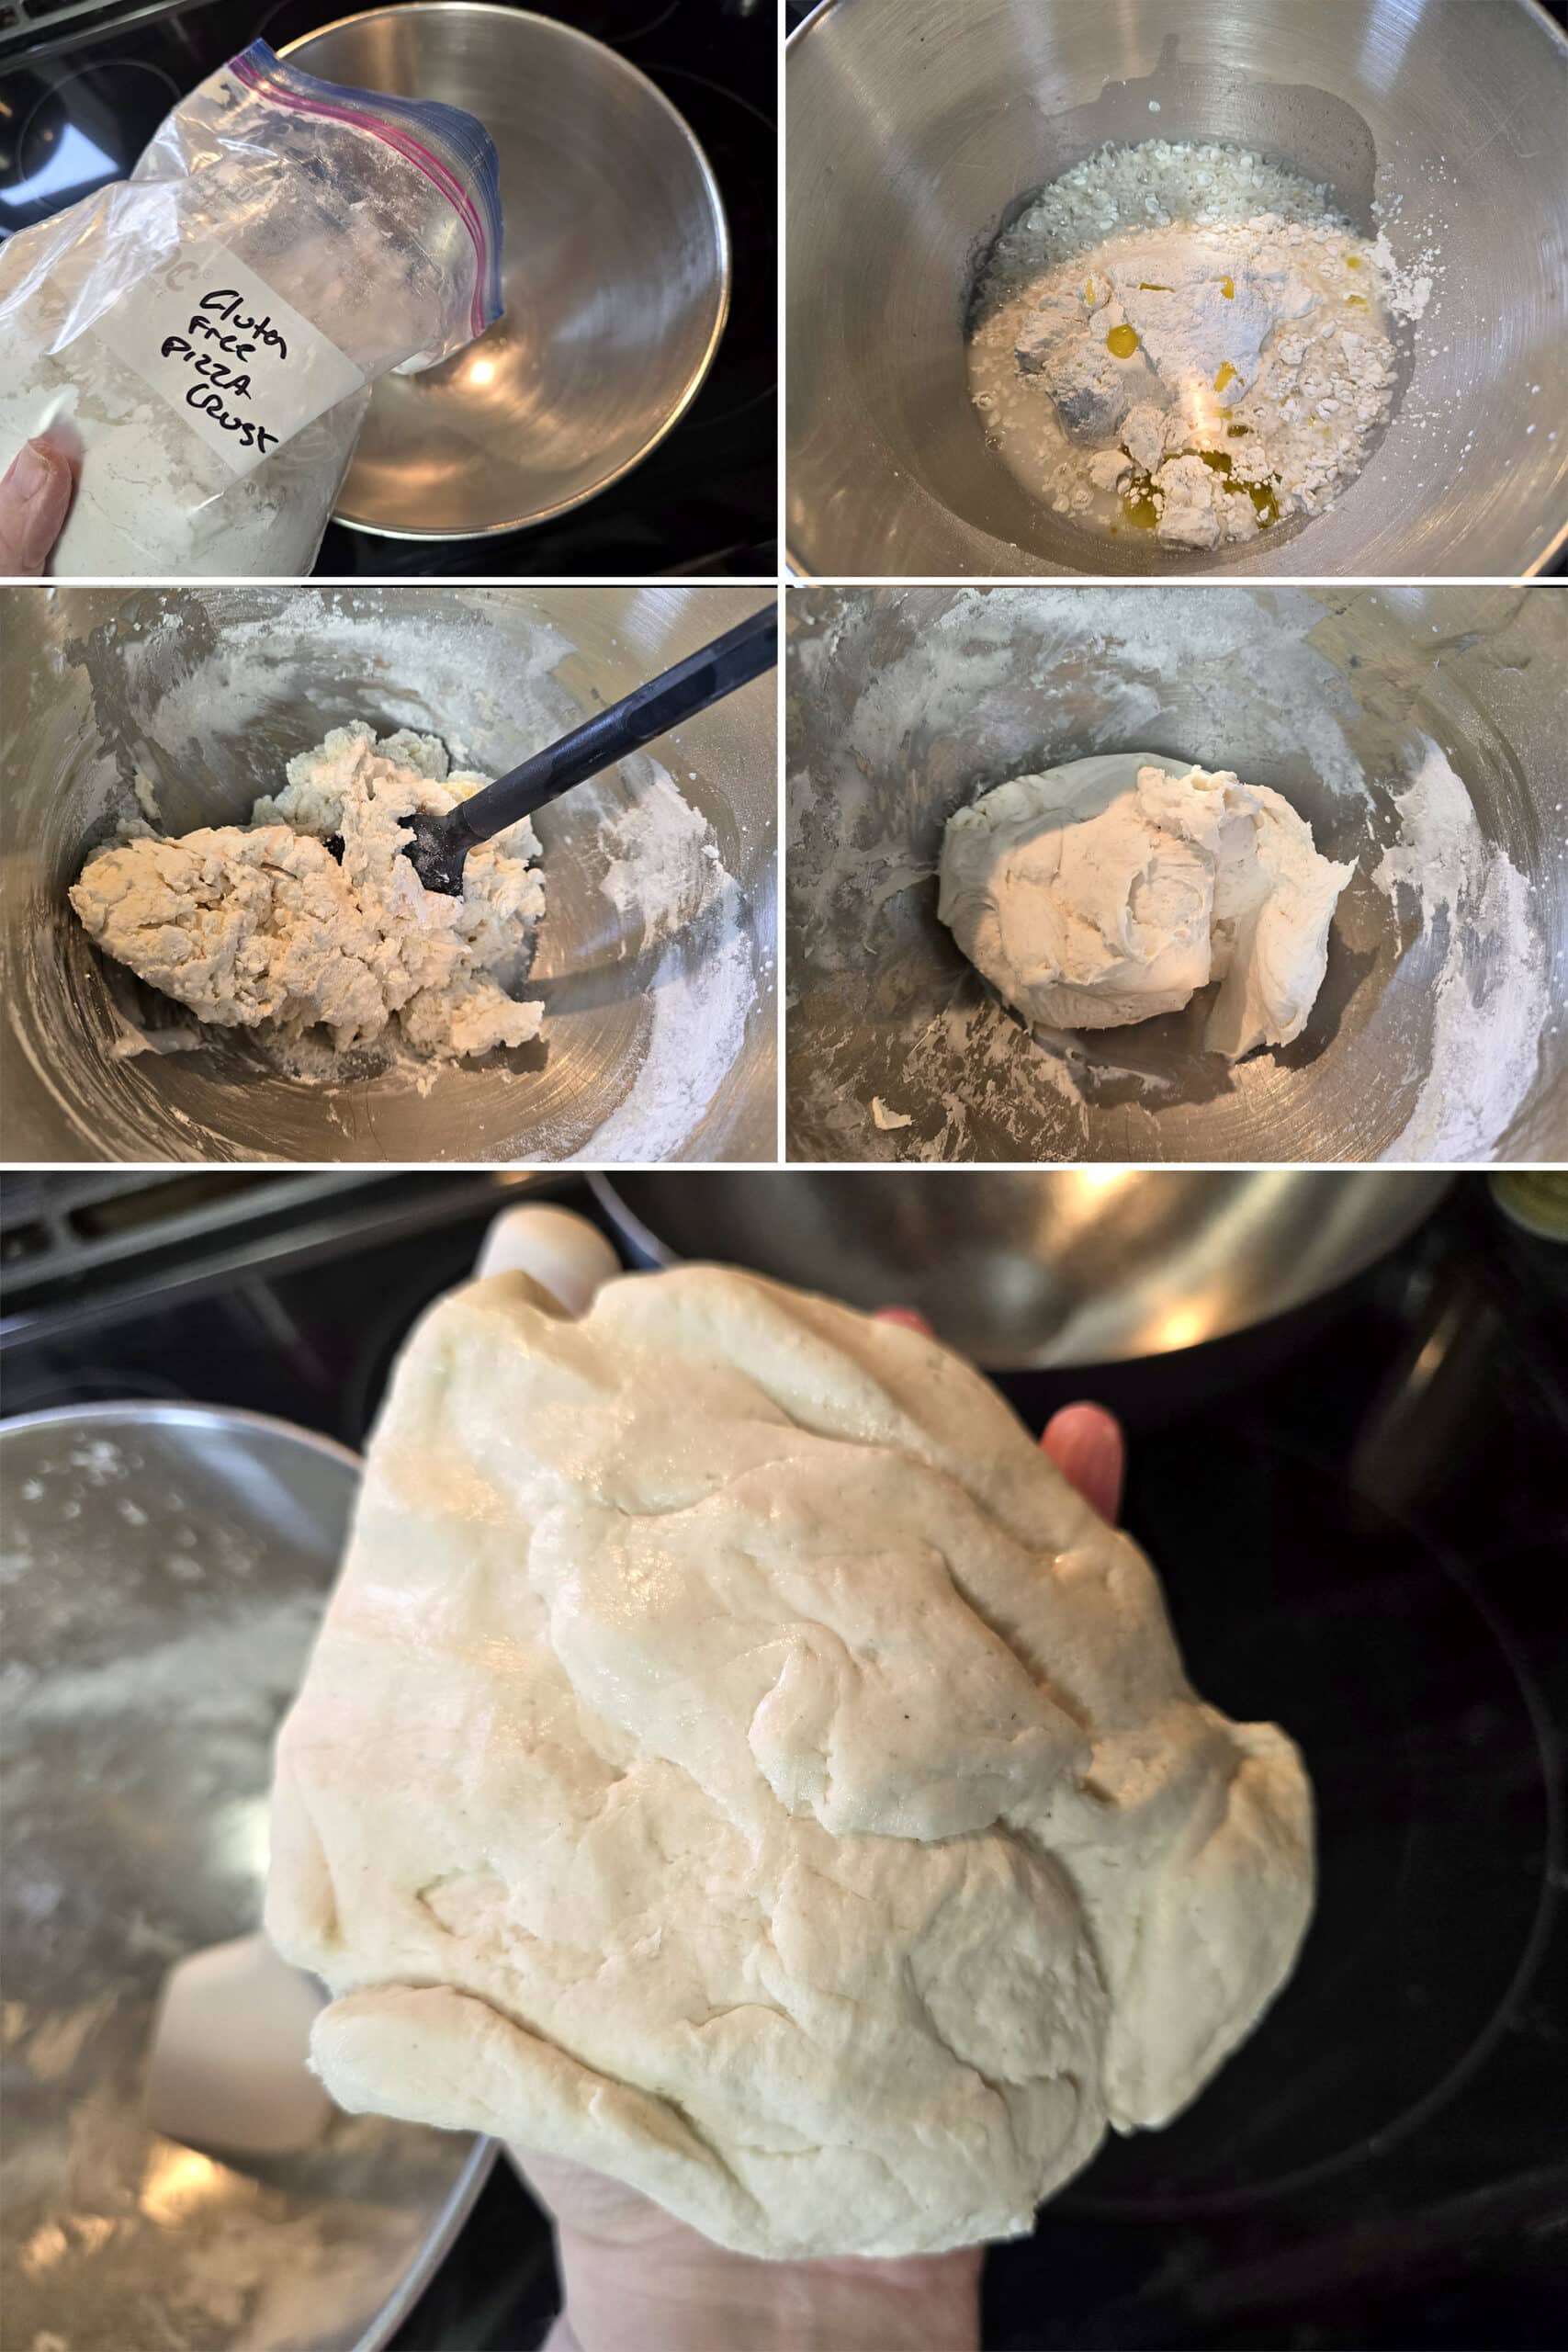
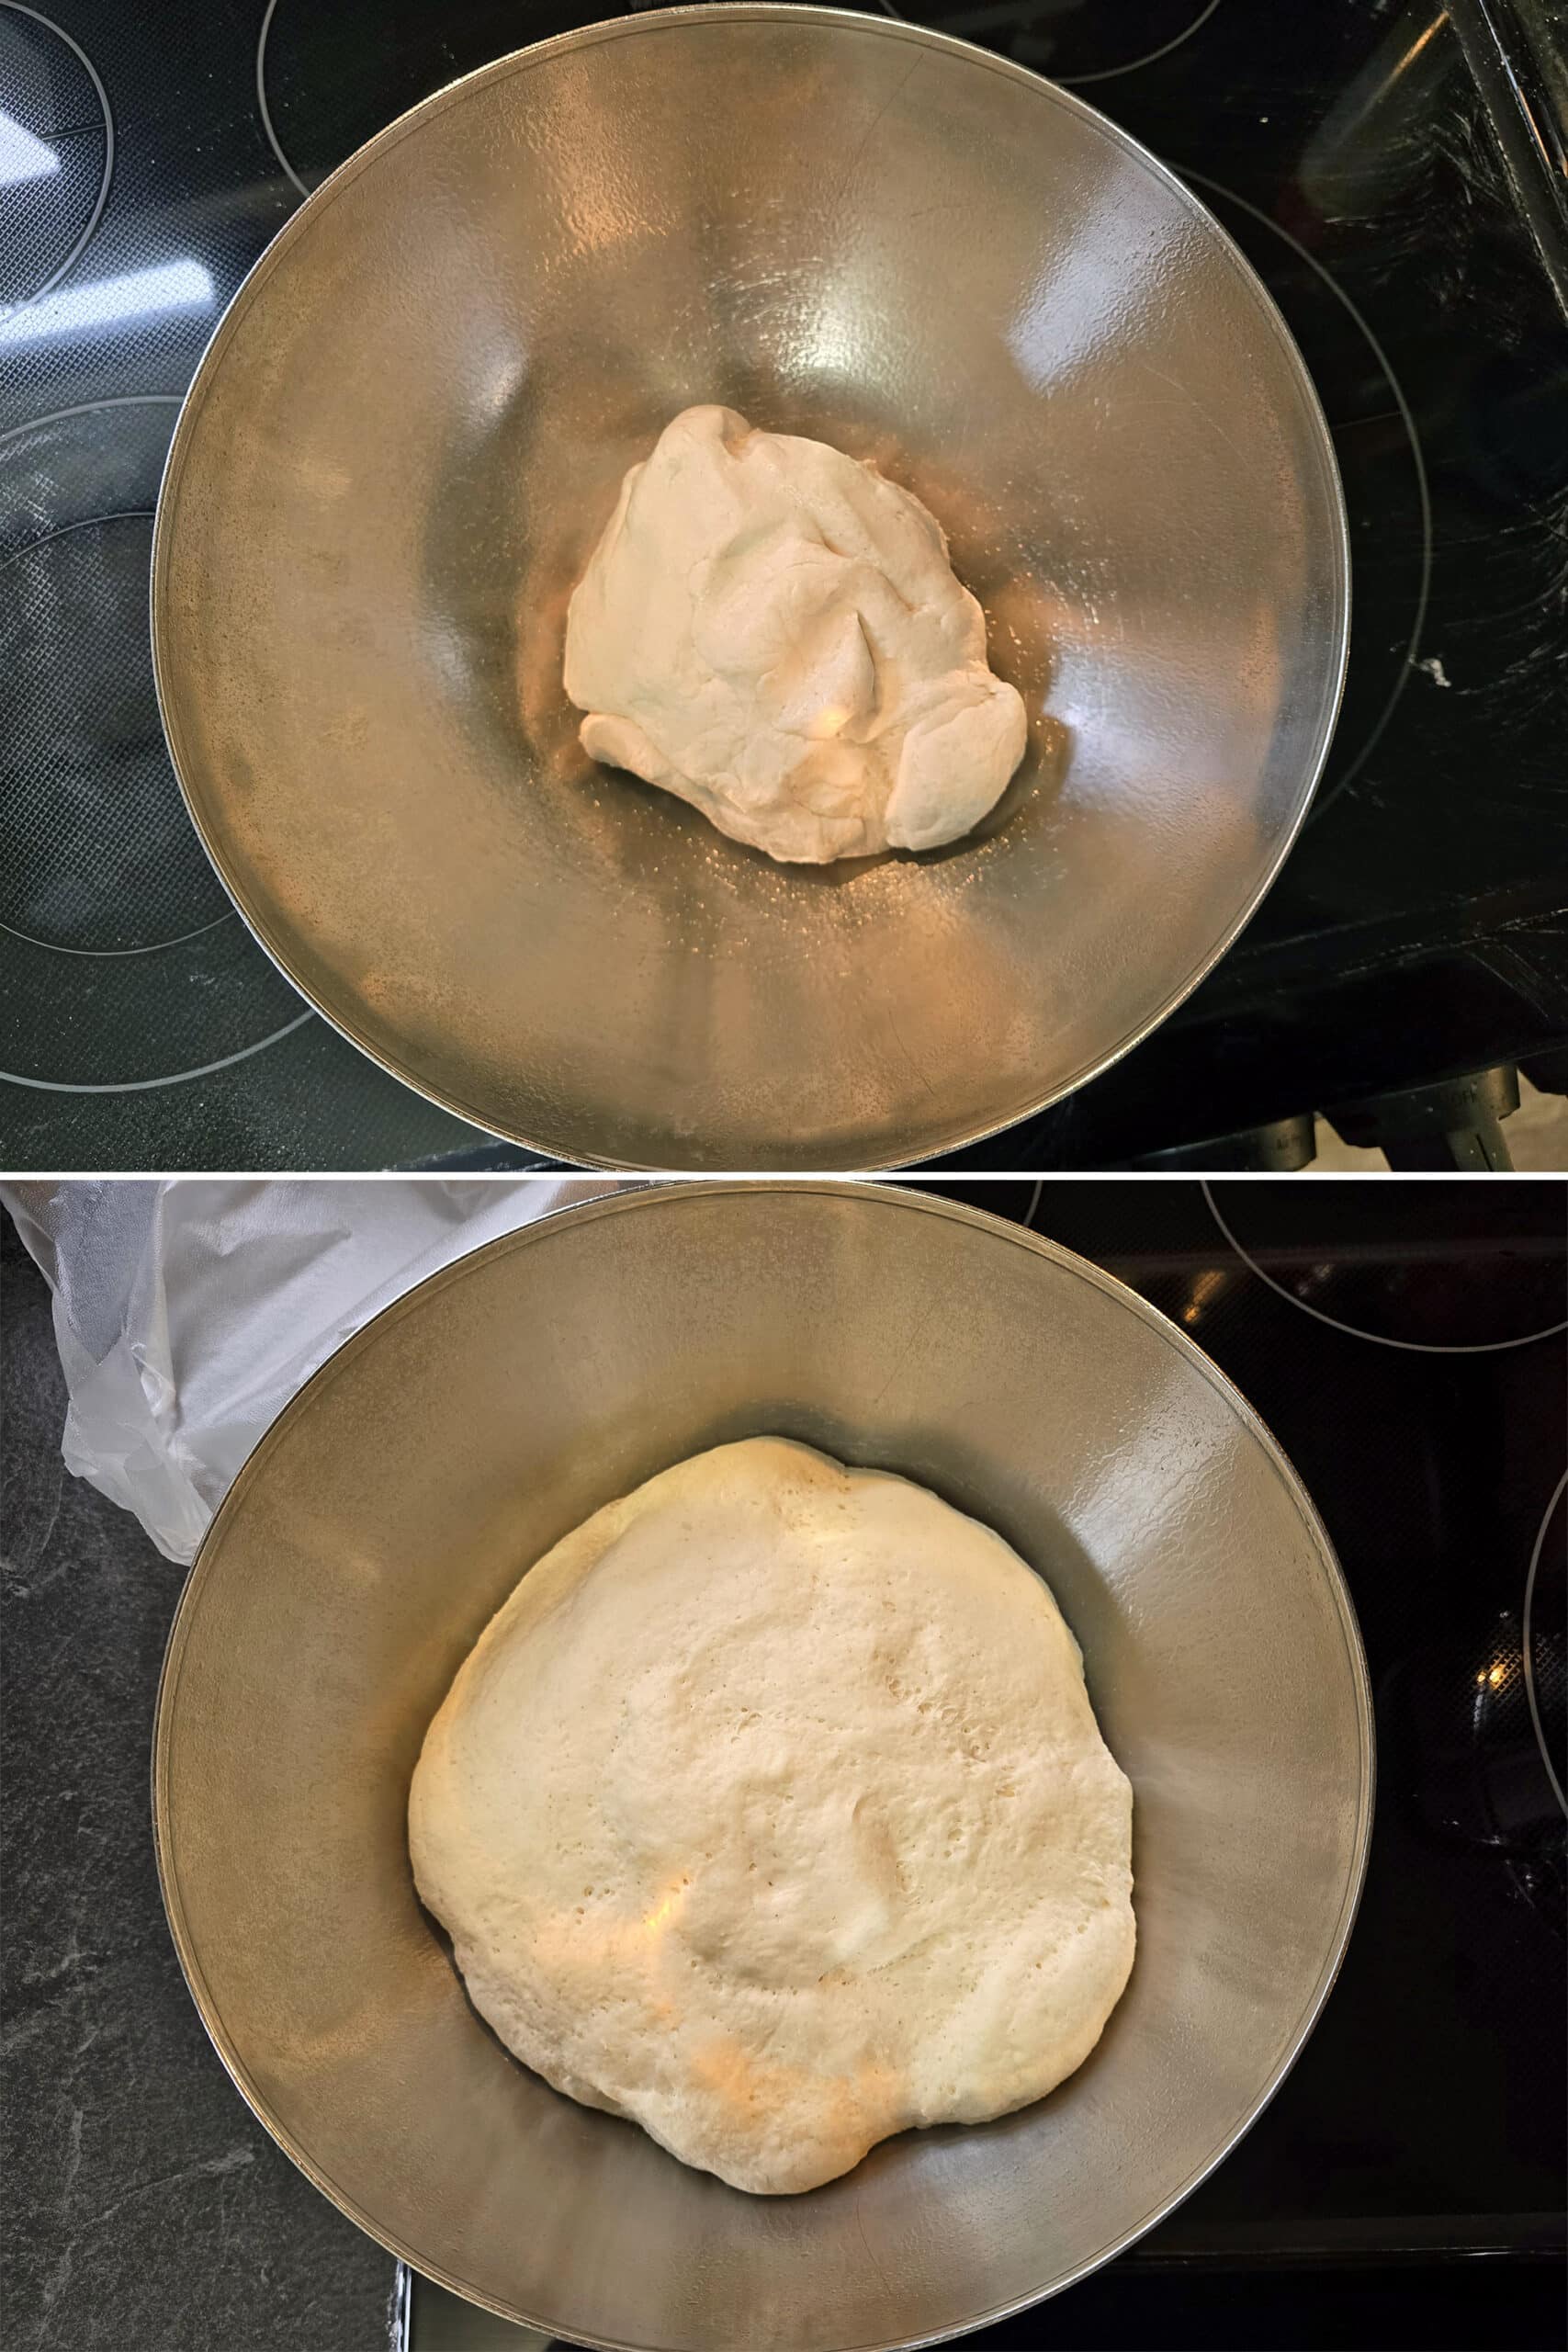
Put the ball of dough back into the bowl, loosely cover the bowl with some plastic wrap, and allow the dough to relax in a cozy spot for about an hour.
Prepare and Cook the Gluten-Free Pizza
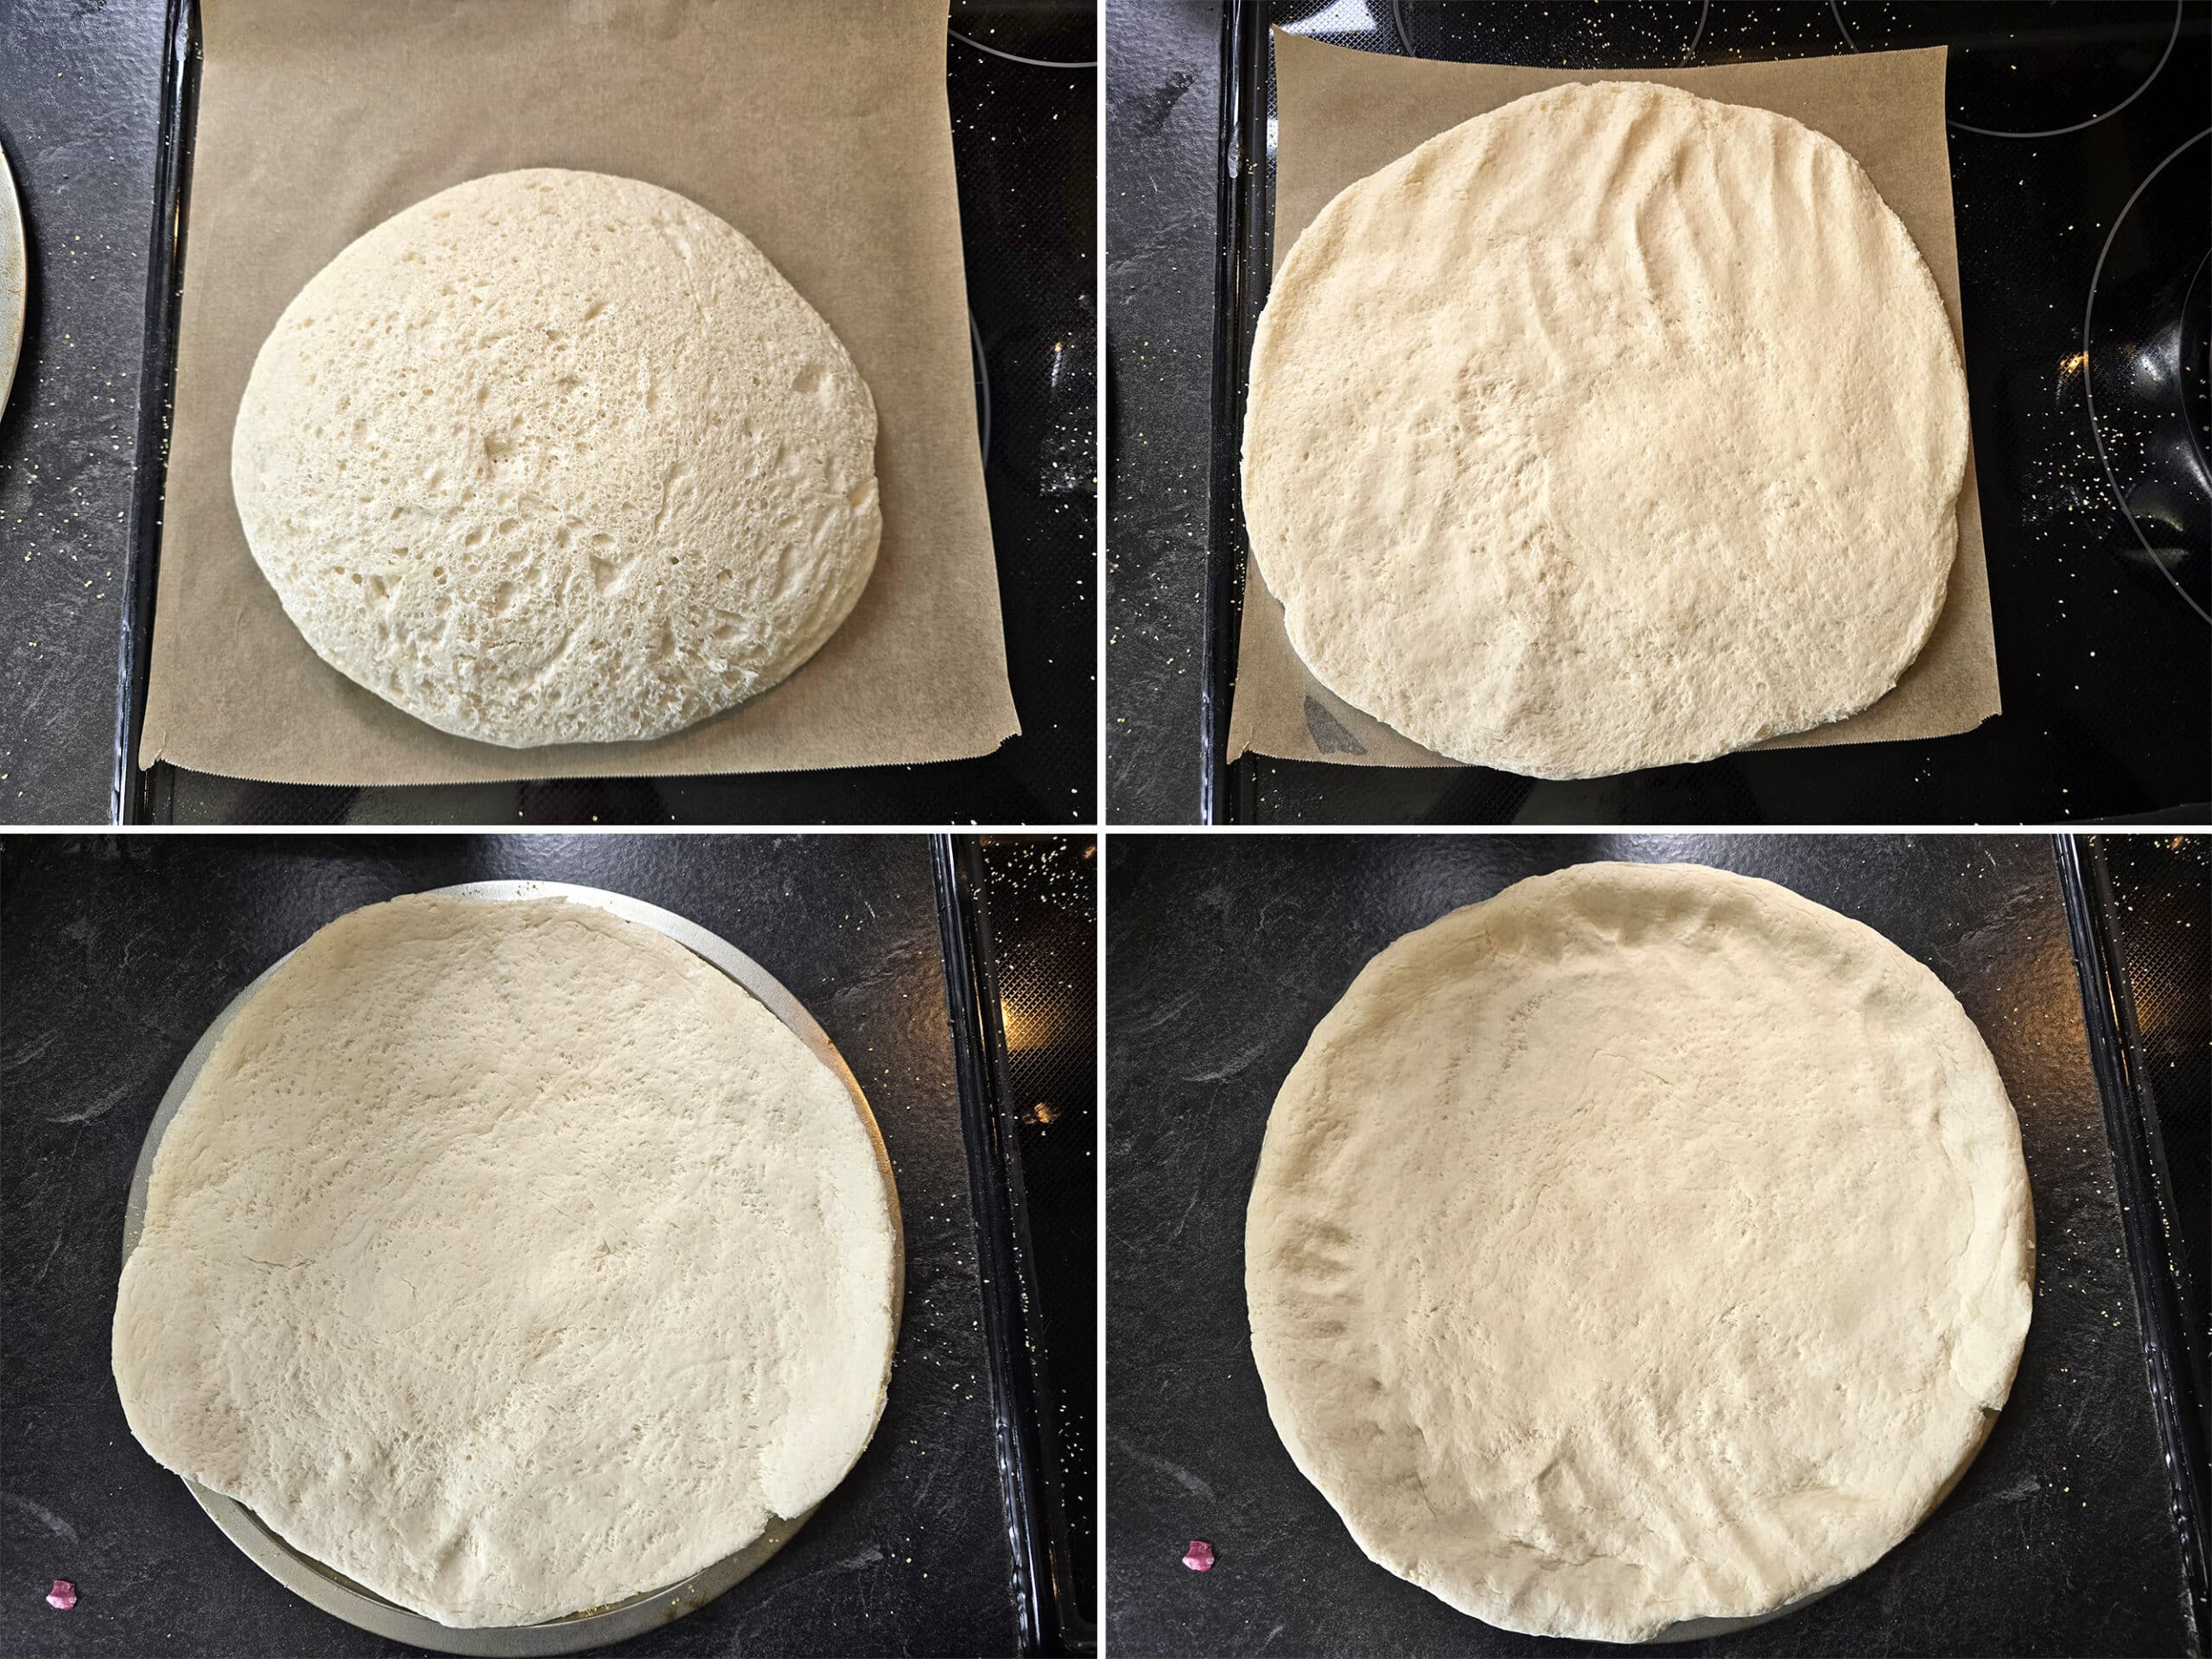
Heat your oven to 450 degrees Fahrenheit, placing the oven shelf about one-third down from the top. Lightly coat a pizza pan or big baking tray with nonstick cooking spray; you can also add some cornmeal for extra texture if you like.
Take off the plastic wrap from the bowl, press the dough down once again.
On a surface dusted with flour, shape the dough into a circular disk measuring approximately 13-14 inches across, then move this dough circle to your prepped baking dish.
Cover the entire crust with olive oil spray, and if desired, dust the edges with sesame seeds.
Let it rise for an additional 10 minutes in a warm spot.

Apply pizza sauce across the dough’s surface, followed by sprinkling shredded mozzarella and adding your preferred toppings.
Slice the pizza and serve it piping hot!
It tastes best when warmed up again. Typically, we zap it in the microwave for about half a minute just to take the chill off, and then complete the process in the air fryer at 375°F for a few minutes until it becomes nice and crispy.

More Gluten-Free Entrée Recipes
Searching for additional dinner options to enjoy with your entire family? Look no further, as I have an array of delicious gluten-free recipe suggestions for you!
Cajun Chicken Sloppy Joes
Chicken Cordon Bleu
(Low Carb)
Creamy Mustard Chicken
Dutch Oven Jambalaya
Easy Campfire Chicken Curry
Egg Roll in a Bowl
Elk Bourguignon
Gluten Free Beet Gnocchi
Ketogenic Chicken Pot Pie Soup
Gluten-Free Coconut Shrimp
Gluten-Free Baked Cod with Cheese Crust
Gluten-Free Baked Cod Cheeks with Stuffing
Gluten Free Crab Cakes
Gluten-Free Creamy Chicken Wild Rice Soup
Gluten-Free Fennel Chicken Soup
Gluten-Free Detroit-Style Pizza
Gluten-Free Fried Chicken
Gluten-Free Jamaican Beef Pastries
Gluten Free Perogies
Gluten-Free Sesame Chicken
Gluten-Free Zesty OrangeChicken
Keto Taco Soup
Gluten Free Tuna Casserole
Mushroom Risotto
Campfire Sloppy Giuseppes
Campfire Sloppy Joes
Low-Carb Spinach and Feta Lasagna


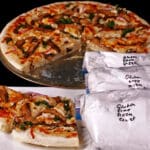
Gluten-Free Pizza Crust Blend
This quick-to-make gluten-free pizza crust mix recipe requires just a few minutes of your time and is incredibly handy to keep around. Simply combine with water and oil!
Servings
4
Servings
Calories
267
kcal
Equipment
-
1 Medium Freezer Baggie
Ingredients
Gluten-Free Pizza Crust Blend
-
2 ¾
cups
Caputo Gluten Free Flour
420 Grams
-
2
teaspoon
Instant Yeast
-
1 ¼
teaspoon
Salt
-
1
teaspoon
Granulated Sugar
-
½
teaspoon
Baking Powder
To Use the Mix:
-
1 ⅓
cup
QuiteWarm – but not hot -Water
-
1
tablespoon
Extra Virgin Olive Oil
-
Cooking Spray
I utilize olive oil spray.
Pizza Assembly:
-
Cornmeal
optional
-
Sesame Seeds
optional
-
¾ – 1
cup
Pizza Sauce
-
2 ½
cups
Mozzarella
-
Toppings of choice
Instructions
Gluten-Free Pizza Crust Blend
-
Attach a label to a medium-sized freezer baggie marked “Gluten-Free Pizza Crust Mix.” Include the list of ingredients beneath “To Use the Mix,” along with any instructions you’ll find useful to keep handy.
-
Pour the flour, yeast, salt, sugar, and baking powder into the baggie. Close it securely, shake well to mix everything together, then let it sit quietly for a moment.
-
Open the pouch again, carefully squeeze out any extra air, then seal it properly. Keep it in a cool, dark, and dry location until you’re ready to use it.
To Use the Mix:
-
Transfer the mixture into a big mixing bowl, or use the bowl attached to your stand mixer.
-
Mix in the hot water and olive oil, stirring thoroughly with a wooden spoon or silicone spatula until combined.
-
Turn the dough out onto a floured surface and knead until it becomes soft and smooth, approximately 3-5 minutes. (As an alternative, you can knead it manually first, then use a stand mixer equipped with a dough hook for around 3 minutes, or continue until the dough achieves a smooth texture).
-
You want the dough to be smooth yet retain a slight stickiness. If the dough lacks this stickiness, incorporate a bit of water and work it in thoroughly. Conversely, if the dough is overly sticky, introduce a small quantity of Caputo flour.
-
After thoroughly kneading the dough, take it out of the bowl and sprayedown the inside of the bowl with cooking spray. Return the dough to the bowl as a rounded mass, then loosely drape the bowl with some plastic wrap and allow the dough to sit undisturbed in a warm area for about an hour.
Prepare and Cook the Gluten-Free Pizza
-
Heat your oven to 450 degrees Fahrenheit and position the rack about one-third from the bottom. Lightly coat a pizza pan or big baking sheet with nonstick cooking spray; you can also add some cornmeal for extra texture if you like.
-
Take off the plastic wrap from the bowl, press the dough down once again.
-
On a surface dusted with flour, shape the dough into a circular disk measuring approximately 13-14 inches across, then move this dough disc to your prepped baking dish.
-
Coat the entire crust with olive oil spray, and if desired, sprinkle the edges with sesame seeds.
-
Let it rise for an additional 10 minutes in a warm spot.
-
Cover the dough with pizza sauce, followed by sprinkling shredded mozzarella and adding your preferred toppings.
-
Place the dish in the preheated oven and bake for 18-22 minutes, until it turns golden brown and becomes bubbling hot. For additional crispiness on top of your pizza, you may use the broiler function for a few minutes—just make sure not to burn it.
-
Slice the pizza and serve it piping hot!
Notes
After cooling down to room temperature, remaining pizza slices can be covered with plastic wrap—or kept in an airtight container in the refrigerator for up to three days.
It’s best when warmed up again. We usually zap it in the microwave for about 30 seconds just to take the chill off, and then put it in the air fryer at 375°F for a short time to make it nice and crispy.
Please be aware that the provided nutrition details are solely for the dough, including the mix and oil. The addition of toppings will alter the overall nutritional content of your dish.
Nutrition
Calories:
267
kcal
|
Carbohydrates:
56
g
|
Protein:
1
g
|
Fat:
4
g
|
Saturated Fat:
0.5
g
|
Polyunsaturated Fat:
0.4
g
|
Monounsaturated Fat:
3
g
|
Sodium:
791
mg
|
Potassium:
15
mg
|
Fiber:
5
g
|
Sugar:
3
g
|
Vitamin C:
0.01
mg
|
Calcium:
39
mg
|
Iron:
0.1
mg
Thanks for Reading!
|


